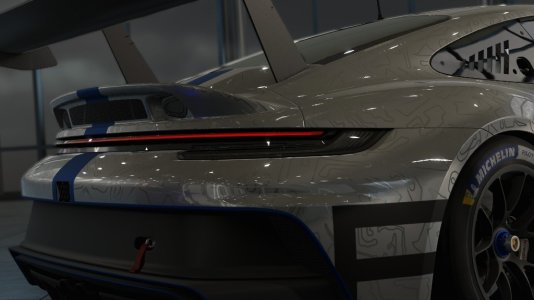
I think they were called simexcel racing but only did 2 or 3 of these unfortunatelywhat happened to this UK company? What is / was the name?
You are using an out of date browser. It may not display this or other websites correctly.
You should upgrade or use an alternative browser.
You should upgrade or use an alternative browser.
Show us your Rig / Cockpit
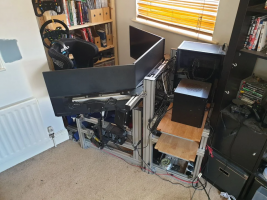
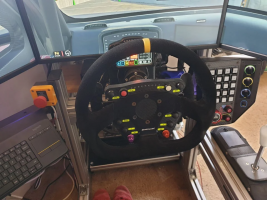
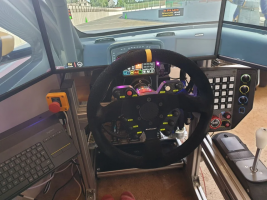
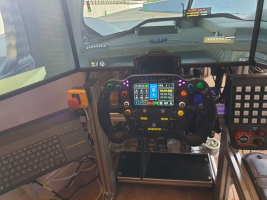
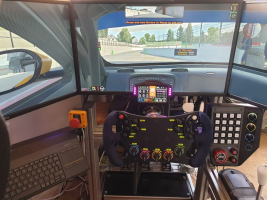
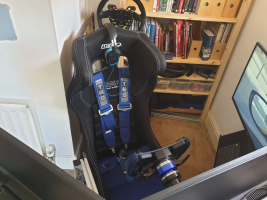
Wanted to share my rig here as I’d gotten it to a point that I’m particularly happy with it.
Partly because it’s 100% DIY hardware.
Rig: Custom design 8020. Uses a few brackets from Motedis, pedal side mount from ProSimRig and a handbrake mount from trackracer.
Seat is a Mirco RS2.
Wheelbase: 20Nm OSW (Project BruteForce2 Ioni based). The only bit of hardware I didn’t directly build, I was looking at an AASD system but this came up 2nd hand at a good price. Precursor to the simucube 1.
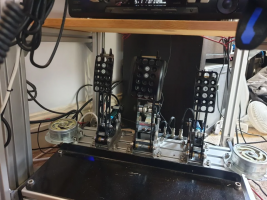
Pedals: Found on grabCAD and later modified with billet pedal faces and hall effect sensors for the throttle and clutch. Electronics are LeoBodnar in a custom designed enclosure.
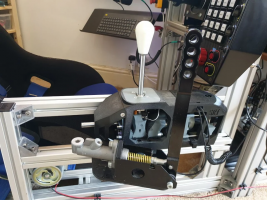
Shifter: Lebois SRT V9 shifter with a small mod to prevent side movement in sequential mode.
Display: Velocitas Imperium C5-DDU. Built without the optional PCB to keep the cost low. Original mount didn’t quite work for my layout so I ended up designing my own.
Handbrake: Really basic, just a potentiometer and a spring in a cheap hydraulic. This was my first DIY project and one on the list for a rebuild.
Button Box: Pokornyi GTE Button Box. Built without modification. Simple enough build and my first time ordering carbon.
Bass Shakers: 4x Rockwood body shakers and a 2nd hand Sony Amp running through Simhub.
Wheels:
Pokornyi LMP Pro: Part finished but enough to function. Currently missing the clutch paddles and coverings for the grips.
Pokornyi WLS GT3: Slightly modified to use a LeoBodnar board and CTS288 encoders.
Am Studio AMG GT3: My first DIY build. Later modified with shifters similar to the Pokornyi ones.
320mm D: Custom design using a Symprojects ProRace Micro for LEDs and a LeoBodnar board. Less useful on a lot of modern cars but used with the 991 cup car a bit.
320mm Round: Simple custom design using a LeoBodnar board. Used mostly for rally and touring cars.
Assorted others: Couple of custom PCD adaptors and some simple wheels. used for stockcar, classics and entry level single seaters.
Attachments
-
 1689604684793.png908.2 KB · Views: 534
 -
 1689604820434.png798.5 KB · Views: 549
 -
 1689604761997.png784.6 KB · Views: 524
 -
 1689604752390.png761.6 KB · Views: 482
 -
 1689604743022.png745.7 KB · Views: 467
 -
 1689604732785.png773.7 KB · Views: 504
 -
 1689604724604.png797.2 KB · Views: 510
 -
 1689604716129.png668 KB · Views: 497
 -
 1689604704122.png849.3 KB · Views: 484
 -
 1689604692857.png753.7 KB · Views: 557
Thankswow. I have managed to get my own DIY 6030 rig in a very small space and I am pretty proud of what I have achieved but you man, its amazing.
now the silly question, how the hell do you get in there to actually drive
Also everyone asks that heh
The whole rig is at an angle so while it doesn't show well in these photos there's a larger than expected gap between the right screen and wall, can kind of see it in the 2nd photo.
To get in is still a little awkward though. I side step past the screen then step over the shifter mounting and into the seat.
I did for a while have it the other way around which was easier to get in but block off the gap at the end (which I couldn't get the rig in due to the width of the triples)
This layout allows me to have that bookshelf to store wheels, books and spares for the rig as I can step through the rig and stand on the other side of the seat
*EDIT*
Added a photo of the gap to get in which is about as wide as I am
Attachments
Last edited:
https://www.facebook.com/reel/1004546704063019
 www.facebook.com

 www.facebook.com
Here is my newest rig under development.

Log into Facebook
Log into Facebook to start sharing and connecting with your friends, family, and people you know.
 www.facebook.com

1K views · 11 comments | Motion Simulator Page on Reels
 www.facebook.com
Here is my newest rig under development.

Last edited:
My rig is very much a work in progress but I thought it worthwhile to show what I have done for a racing wheel and shifter.
The PC racing wheel is a G920 with a Nardi "Personal" model DG-00 that I got some time ago with a car attached to it. The Nardi had black anodized spokes with a maple-colored (i.e. quite orange) rim that didn't match the black car interior. (What were they thinking?!?!)
I stripped the wood and painted the rim black. I also decided to add a sew-on leather rim cover before mounting to the G920. I designed my own adapter so I could keep the horn button, but eBay had one that has the same functionality. Aside from needing to maximize the force feedback settings because of the larger & heavier steering wheel it works quite well.
The shifter is a "generic" one, but modified to duplicate the "look and feel" of the car shifter shown in the photo below. A steel rod was cut & bent, the ends tapped M8, and it was joined to the shifter rod with suitable coupling nut, lock washers and standard-type nuts. Because the car shifter I am duplicating is a 5-speed with a specific pattern, an easily removable plastic washer was added to lock out 6th gear and was secured with a button-head screw & nut.
IMHO, the longer shift rod significantly improves the feel of this shifter.
I'll post more on the rig/cockpit as it takes shape. For now, I'm just using those items secured to modified commercial-type metal business desk equipped with (3) 22-inch monitors.
great foundationRig, seat and PC will stay, everything else will be swapped eventually.

D
Deleted member 197115
-
Deleted member 197115
Just confirming that CubeControl wheel side is 100% compatible with Buchfink Q1R base side and available in Microcenter. It says base side but it's actually wheel side.Apparently the Q1R isn’t patented and Cube Controls copied the design 1/1 with no permission, I find out afterwards watching this video, even the 2 parts go together like Q1R base side fits Cube wheel side, awesome kit though it’s got 50/70mm offset both sides.
Much cheaper for US folks than ordering from some EU places like Ascher Racing
Yeah I had loads in the end maybe like 12, they fit perfect, like 100% exact same thing, the Cube one colours I like so stuck to these but lost them all now these wheels was left in Ukraine sadlyJust confirming that CubeControl wheel side is 100% compatible with Buchfink Q1R base side and available in Microcenter. It says base side but it's actually wheel side.
Much cheaper for US folks than ordering from some EU places like Ascher Racing
Started with one of these in the PS1 Era

And then to a desk mount DFGT and then to a T300RS on an NLR stand and now We're here.

And then to a desk mount DFGT and then to a T300RS on an NLR stand and now We're here.
Current situation

Elmar3rd
Premium
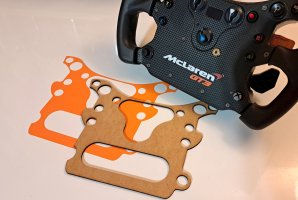
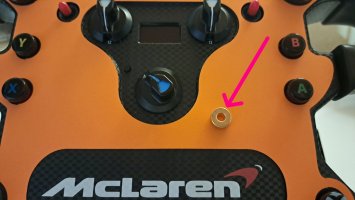
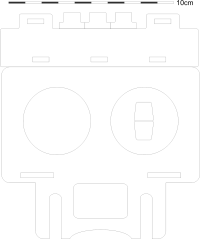
Today I made a template for one of my wheels. It's made of thicker paper and the laser cutter only needs a minute. It is fixed with a magnet on one of the wheels screws so the templates can be replaced easyly.This is my "qick'n dirty" keyboard holder. Made of 3mm plywood with a laser cutter. Mounted with office-clamps on my Fanatec CSL DD.
The idea was to write the key-bindings for several games on it. But it also looks pretty cool.
I also made one of wood, for the gentlemen drivers.
Attachments
Elmar3rd
Premium
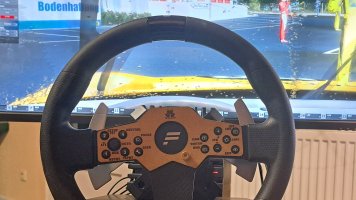
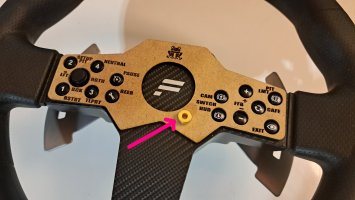
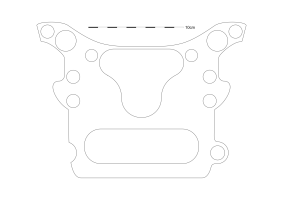
As threatened, I made a template for the Fanatec P1. It is made of wood with key bindings on it and fixed with a magnet. I use this bindings for the Asseto Corsa Club Races here on RD [1].Today I made a template for one of my wheels. It's made of thicker paper and the laser cutter only needs a minute. It is fixed with a magnet on one of the wheels screws so the templates can be replaced easyly.
The idea was to write the key-bindings for several games on it. But it also looks pretty cool.
I also made one of wood, for the gentlemen drivers.
[1] https://www.racedepartment.com/news/clean-fair-and-fun-join-our-weekly-club-races.1378/
Attachments
Michael Krone
Premium
Almost time to put up that damn tree huh?View attachment 698864
my rig build. Ready for the winter
Elmar3rd
Premium
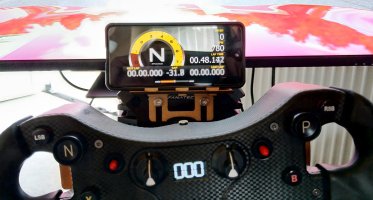
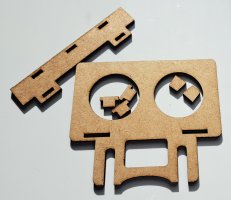
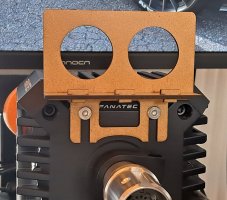
Yesterday I made a phone holder for the CSL DD. It's useful and easy to use with the Simhub mobile dash.
As always: laser cutter, 3mm plywood, no glue.
As always: laser cutter, 3mm plywood, no glue.
Attachments
Last edited:
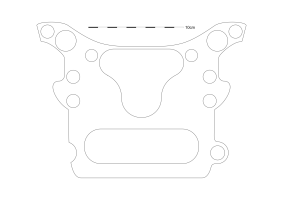
Very nice. How did you get the sizing for the template? Is there a guide available online that I can download and cut myself by hand?Today I made a template for one of my wheels. It's made of thicker paper and the laser cutter only needs a minute. It is fixed with a magnet on one of the wheels screws so the templates can be replaced easyly.
The idea was to write the key-bindings for several games on it. But it also looks pretty cool.
I also made one of wood, for the gentlemen drivers.
Thanks a lot. I will give this a shot.Print the PDF (DIN A4).
(don't shrink or fit pages)
Latest News
-
Macau Grand Prix in Sim Racing: Deserving of More?This weekend is the Macau Grand Prix and whilst a shadow of its former self, this tight street...
- Angus Martin
- Updated:
- 3 min read
-
How One Announcement Quadrupled Forza Horizon 4's Player BaseIt is exactly one month until Forza Horizon 4 will no longer be available to purchase online...
- Angus Martin
- Updated:
- 2 min read
-
Assetto Corsa EVO New Car Configurator In The PipelineAfter this year's sim Racing Expo, the excitement around Assetto Corsa EVO has continued to...
- Connor Minniss
- Updated:
- 2 min read
-
Steering Wheel Showdown: Which Wheel Would You Like A Sim Racing Version Of?Sim racers have plenty of choice when it comes to hardware. There are a number of cool steering...
- Yannik Haustein
- Updated:
- 2 min read
-
Gran Turismo 7: Yamauchi Teases New Cars For Update 1.53It is that time again when Gran Turismo series producer Kazunori Yamauchi teases us with an...
- Luca Munro
- Updated:
- 5 min read
-
Automobilista 2: Incoming DLC Will Have Free Trial PeriodWith the big v1.6 update, plenty of new content is coming to Automobilista 2. Players who are on...
- Yannik Haustein
- Updated:
- 2 min read
-
Le Mans Ultimate Online Subscriptions Expected To Arrive In December 2024Ahead of the expected December update to Le Mans Ultimate, Motorsport Games reported its Q3...
- Yannik Haustein
- Updated:
- 2 min read


