Yeah I knew something was missing in my life it’s that glove tray!I like the little tray for your gloves, it's the little details. Looking great.
You are using an out of date browser. It may not display this or other websites correctly.
You should upgrade or use an alternative browser.
You should upgrade or use an alternative browser.
Show us your Rig / Cockpit
Paul Glover
I talk lots
My setup from Venom simracing.
View attachment 442087
I have a hunch you might be a Ferrari fan?
Paul Glover
I talk lots
Hello All
Just got into sim racing this past month and a little intimidated by the great rigs I'm seeing here but I guess i have to start somewhere.
Well here the evolution of my rig so far.
Started out trying to go as low budget as possible with a $90.00 wheel and pedal set and an improvised rig but quickly realized that it wouldn't cut it.

Sent back the PXN 3V and traded up to a G29.

The G29 was a great move but the rig was still lacking.
A Playseat F1 is not in the budget so I decided to make a copy with left over material from my house renovations.


Tested this setup for a few days and determined some improvements were needed. the steering wheel mount was flexing way too much and the pedal board was too upright. Also the monitor had no articulation mounted at that angle so I built a platform for the monitor. Replaced the wheel support with a cutout piece of 2X10 and tilted the pedal board forward to suit me.


Also made the steering wheel mount adjustable for angle. The first one was mounted solid to the upright.

What a difference a good setup makes. I've seen a marked improvement in my lap times already. Would love to have a motion simulator with Fanatec hardware but unfortunately that won't be happening any time soon
Thanks for looking
Great work!
Painted and waiting for decals.

Whoa did you just bend one of those plastic seats like a taco shell?
Yes Sir. Heatgun. Might not look pretty but it works.Whoa did you just bend one of those plastic seats like a taco shell?
Did a few changes to my sim rig setup. Moved the hand brake lever from horizontally beside the seat base to mounted vertically alongside the shifter. Is far easier to use now as I can always keep my right hand on the wheel rather than constantly switching hands just to use the brake lever. But the most prominent change is the new Samsung Odyssey G9 49" curved screen that replaced my older Samsung LC49. The new screen allows me to step up to 1440p gaming which even at this early stage is quite a visual improvement and the curvature of the screen is much more pronounced at 1000R vs 1800R of the old screen. Wasn't a particularly cheap upgrade as it cost me $2500 (Aussie dollars) but my wife helped put some money towards it and took my old screen to use for her new work from home clerical job. So it was a win-win situation!
Here are some comparison photos to show the difference in curvature between the new and old monitors!
The edges of the new monitor are over 6 inches further forward! Its quite a noticeable difference!


Here are some comparison photos to show the difference in curvature between the new and old monitors!
The edges of the new monitor are over 6 inches further forward! Its quite a noticeable difference!
Nice setup.
I have the Samsung 32" G7 1440p 16:9 which I'm really happy with so the G9 is a progression from there. I like them because they are VA panels which give great contrast and rich colour. They have a downside in limited viewing angle but that doesn't bother me as I don't generally play my games from the other side of the room.
I couldn't stretch to the G9 but I can see the logic as it should just be the only monitor you should ever need for either racing or doing work with it in the future without going to triples.
Perhaps your wife will inherit the G9 at some point when you do your next upgrade
I bought a second hand car seat for my rig. Oh man is it way comfier than the cheap one that came with my first rig.

I really need to tidy it up now, but I actually want to start using it a bit first!
I had to bodge the HOTAS too. The cable between the stick and throttle was woefully short and hardwired (I really should have spent more money on a half decent one). Ended up buying a HDMI extension cable and splicing it between the two
stigs2cousin
Premium
View attachment 444685
I really need to tidy it up now, but I actually want to start using it a bit first!
Thats a good idea!
For sure you will find things to change and/or add when using it.
so before finalising, let alone painting it use it for a few weeks.
My rig changed a lot over the last year.
Since your rig is DIY its easy to adapt.
MFG Carsten
Looks like a Ferrari to mePainted and waiting for decals.

Hi folks, not sure if this is right thread but I'm considering building a cockpit out of unistrut (steel U channel strut). I found a company that will be powder coat and cut the strut to custom sizes:

 www.strutchannelsdirect.com
Does anyone have any plans for a channel strut cockpit? I've seen loads for wood and extruded aluminium but nothing for unistrut. Seems mad given how strong and easy unistrut is to work with, for the price (£10ish for 3m). I think a whole cockpit should be doable for under £200.
My (probably overly optimistic) hope is that I can find a suitable base plan, send a part list to these guys and get back a sleek black bunch of steel and fasteners to bolt together at home.

Powder Coated Strut Channel | Strut Channels Direct
RAL coloured slotted strut channel available to order online in Black, White, Grey and Luminous Yellow
Does anyone have any plans for a channel strut cockpit? I've seen loads for wood and extruded aluminium but nothing for unistrut. Seems mad given how strong and easy unistrut is to work with, for the price (£10ish for 3m). I think a whole cockpit should be doable for under £200.
My (probably overly optimistic) hope is that I can find a suitable base plan, send a part list to these guys and get back a sleek black bunch of steel and fasteners to bolt together at home.
Made the same transition... I would recommend to try and bring the monitor closer to you to fully benefit from the curvature and better FOV. Best would be either close to the back side of the wheelbase or above it to bring it even closer to you.Did a few changes to my sim rig setup. Moved the hand brake lever from horizontally beside the seat base to mounted vertically alongside the shifter. Is far easier to use now as I can always keep my right hand on the wheel rather than constantly switching hands just to use the brake lever. But the most prominent change is the new Samsung Odyssey G9 49" curved screen that replaced my older Samsung LC49. The new screen allows me to step up to 1440p gaming which even at this early stage is quite a visual improvement and the curvature of the screen is much more pronounced at 1000R vs 1800R of the old screen. Wasn't a particularly cheap upgrade as it cost me $2500 (Aussie dollars) but my wife helped put some money towards it and took my old screen to use for her new work from home clerical job. So it was a win-win situation!
Here are some comparison photos to show the difference in curvature between the new and old monitors!
The edges of the new monitor are over 6 inches further forward! Its quite a noticeable difference!
Not sure your stand allows that though.
Curvalicous. That monitor is insane. Mine is the first I’ve ever seen in person and I love it. I can only imagine what that sexy thing must be like. Congrats. Enjoy.Did a few changes to my sim rig setup. Moved the hand brake lever from horizontally beside the seat base to mounted vertically alongside the shifter. Is far easier to use now as I can always keep my right hand on the wheel rather than constantly switching hands just to use the brake lever. But the most prominent change is the new Samsung Odyssey G9 49" curved screen that replaced my older Samsung LC49. The new screen allows me to step up to 1440p gaming which even at this early stage is quite a visual improvement and the curvature of the screen is much more pronounced at 1000R vs 1800R of the old screen. Wasn't a particularly cheap upgrade as it cost me $2500 (Aussie dollars) but my wife helped put some money towards it and took my old screen to use for her new work from home clerical job. So it was a win-win situation!
Here are some comparison photos to show the difference in curvature between the new and old monitors!
The edges of the new monitor are over 6 inches further forward! Its quite a noticeable difference!
View attachment 444658View attachment 444659
View attachment 444660
stigs2cousin
Premium
Hi folks, not sure if this is right thread but I'm considering building a cockpit out of unistrut (steel U channel strut). I found a company that will be powder coat and cut the strut to custom sizes:

Powder Coated Strut Channel | Strut Channels Direct
RAL coloured slotted strut channel available to order online in Black, White, Grey and Luminous Yellowwww.strutchannelsdirect.com
Does anyone have any plans for a channel strut cockpit? I've seen loads for wood and extruded aluminium but nothing for unistrut. Seems mad given how strong and easy unistrut is to work with, for the price (£10ish for 3m). I think a whole cockpit should be doable for under £200.
My (probably overly optimistic) hope is that I can find a suitable base plan, send a part list to these guys and get back a sleek black bunch of steel and fasteners to bolt together at home.
The plan you could easyly draw yourself, the same with the parts list.
I´m a bit sceptical about the fastener thing.
If you can weld everything together you could build a rig like a rollcage, optimum rigidtiy and wild style points
So when you resort to bolting everything together to get enough rigidity you´d have to drill through the strut and bolt a fastener to both sides.
The beauty about profile rigs is that the joints bolted together with the triangles are very stiff in every direction..
If it was me i´d search for a good profile source, even if it endet up a bit more expensive in the short run.
A profile rig is just a lot more versatile and can easily be adapted to different seating positions and changing hardware, so it´s alot more futureproof.
( And yes, i´m sitting in my DIY profile rig while typing this
MFG Carsten
Made the same transition... I would recommend to try and bring the monitor closer to you to fully benefit from the curvature and better FOV. Best would be either close to the back side of the wheelbase or above it to bring it even closer to you.
Not sure your stand allows that though.
Yeah screen definitely does need to be closer to me but that particular rig frame doesn't allow a lot of adjustment so I'll need to do some modifications to reshuffle things about.
My other issue is that I also use this rig for Flight Sims so i still need to be able to slot in the flight pedals which was tricky, especially after upgrading to the Fanatec pedal set. Previously with the Logitech pedals it was relatively easy to remove them and fit the flight pedals. The Fanatecs would be a nightmare to do this..
Last edited:
Hi folks, not sure if this is right thread but I'm considering building a cockpit out of unistrut (steel U channel strut). I found a company that will be powder coat and cut the strut to custom sizes:

Powder Coated Strut Channel | Strut Channels Direct
RAL coloured slotted strut channel available to order online in Black, White, Grey and Luminous Yellowwww.strutchannelsdirect.com
Does anyone have any plans for a channel strut cockpit? I've seen loads for wood and extruded aluminium but nothing for unistrut. Seems mad given how strong and easy unistrut is to work with, for the price (£10ish for 3m). I think a whole cockpit should be doable for under £200.
My (probably overly optimistic) hope is that I can find a suitable base plan, send a part list to these guys and get back a sleek black bunch of steel and fasteners to bolt together at home.
My favorite unistrut rig is called Mid Century Modern and they guy that made it did make plans, though might not be what you're looking for
stigs2cousin
Premium
Yeah screen definitely does need to be closer to me but that particular rig frame doesn't allow a lot of adjustment so I'll need to do some modifications to reshuffle things about.
My other issue is that I also use this rig for Flight Sims so i still need to be able to slot in the flight pedals which was tricky, especially after upgrading to the Fanatec pedal set. Previously with the Logitech pedals it was relatively easy to remove them and fit the flight pedals. The Fanatecs would be a nightmare to do this..
How about two different pedal plates with quick releases?
For example fix it in place with bolts, hold down with something like this?
So to change you just have to open the latches, and lift the pedalplate up,
put the other onto the bolts and fix the latches?
MFG Carsten
Latest News
-
How One Announcement Quadrupled Forza Horizon 4's Player BaseIt is exactly one month until Forza Horizon 4 will no longer be available to purchase online...
- Angus Martin
- Updated:
- 2 min read
-
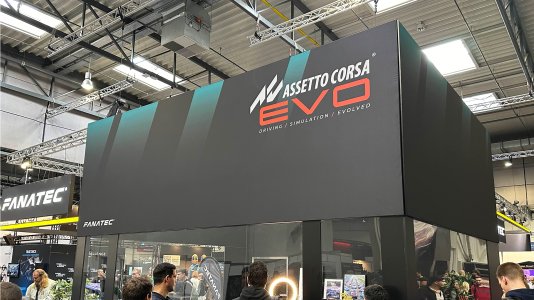
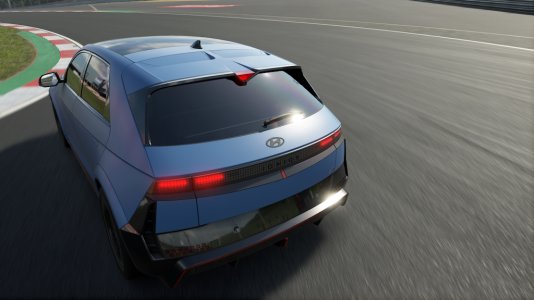
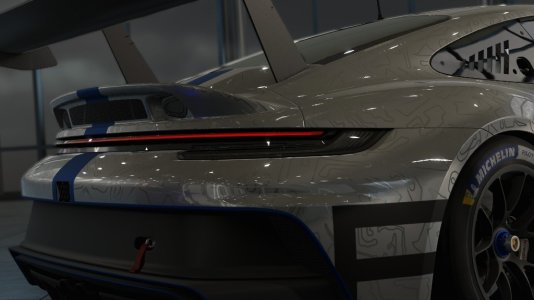
Assetto Corsa EVO New Car Configurator In The PipelineAfter this year's sim Racing Expo, the excitement around Assetto Corsa EVO has continued to...
- Connor Minniss
- Updated:
- 2 min read
-
Steering Wheel Showdown: Which Wheel Would You Like A Sim Racing Version Of?Sim racers have plenty of choice when it comes to hardware. There are a number of cool steering...
- Yannik Haustein
- Updated:
- 2 min read
-
Gran Turismo 7: Yamauchi Teases New Cars For Update 1.53It is that time again when Gran Turismo series producer Kazunori Yamauchi teases us with an...
- Luca Munro
- Updated:
- 5 min read
-
Automobilista 2: Incoming DLC Will Have Free Trial PeriodWith the big v1.6 update, plenty of new content is coming to Automobilista 2. Players who are on...
- Yannik Haustein
- Updated:
- 2 min read
-
Le Mans Ultimate Online Subscriptions Expected To Arrive In December 2024Ahead of the expected December update to Le Mans Ultimate, Motorsport Games reported its Q3...
- Yannik Haustein
- Updated:
- 2 min read
-
4 Good Value Sim Racing Cockpits Under €500Sim racing can be expensive. But fear not, if you do not have thousands of Euros, Pounds or...
- Connor Minniss
- Updated:
- 6 min read


