DIY Sim / Productivity Rig with Tactile - Build Log

Hi All!

I am starting this log as a story of my journey in upgrading my outdated desk to proper sim rig. In the process I stumbled across a lot of issues and questions, for which I could not find detailed information and pictures (as far as I saw it is quite common for the subject). This I decided to write up a build log with all that was done.

First of all, here is what I started with:
image001.jpg

image003.jpg


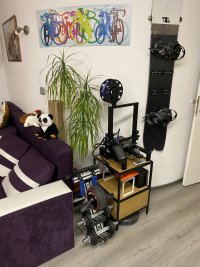
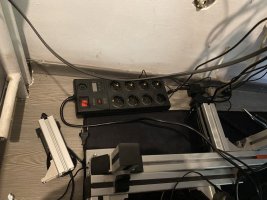
This is my old gaming desk, which was used both for sim racing and work (I work home office). The biggest issue with it was that when I switched to Fanatec setup it was not adequate support any more and I had to start thing of something more stable. Also another issue was that every evening after finishing work I had to mount the wheel and handbrake to drive, then had to remove them in the morning. This is not so big deal, but some evening I was just too laze to do it so I wouldn't play.

First I started investigating buying pre-fabricated rig, but all of them wouldn't fit my needs. As I am long years experienced computer modder, of course decided to pursue the DIY path. Lucky for me I was able to source all materials locally and they were rather cheap - I was way under the pre-made rig prices.

First of all started by listing all the requirements:

1. Completely DIY scratch build by my design
2. Will be used both for work and sim racing
3. Seat has to be high so I can rest my feet on ground (as I am 1.90m tall this required seat height about 40-50cm above ground)
4. All driving gear should be mounted permanently and not get in the way of monitors while in work mode (Fanatec coming with QR system is great advantage)
5. Ideally pedals will be mounted so I can stretch my legs and rest on them while working
6. Integrated monitor stand is preferred
7. Shifter, handbrake should be mounted in such way that mouse can be used all the time in comfortable position (work mode)
8. Seat should have sliders to be comfortable for other people, also for easier access

Having this in mind, I went ahead and downloaded MayCad (apparently the preferred tool for designing with Alu extrusion profiles). Right now I do not have the original design at hand, but either way we will get to this stage later in the build log.

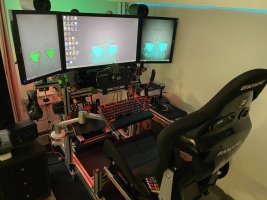
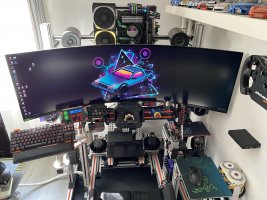
For now let's start with a Teaser picture of the current state of the rig:

image002.jpg


After building the first version, I could not stop so added the following:

1. Made new gear / info displays (I am using Simhub)
2. At some point switched to complete Fanatec setup (pedals and shifter)
3. Added a wind sim
4. Added 4 Aura bass shakers in chassis mode for tactile feedback
5. Added addressable RGB lighting showing REVs and light effects

Here is short video demoing the RGB lighting:


Of course I have other upgrades planned, but they will be done later on after the summer ends:

1. I have 4 more Dayton DAEX32EP-4 exciters, which will have to mount for additional effects - still have not decided where to put them exactly.
2. Will change monitor setup - actually already got whatever I need, but no time to install it - will be updated later when I get to it
3. Will have to upgrade my PC - I am still using Athlon FX 8350 with GeForce 1060 and it is getting very outdated
4. Will be retiring my modded PC case as it does not provide easy access. Already made preliminary design how all will look

In the upcoming days I will be posting replies on the topic with a lot of pictures and technical details following the extensive collection of photos I took in the process and also sharing all the technical solutions I came up.

Hope this helps others and you enjoy my story,
Cheers,
Stoyan
 
Last edited:
Part 18 - Shaker Main Switch, New Wheel

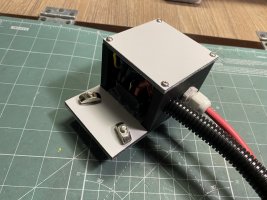
Finally managed to complete the new main switch for powering the shaker amps. Again the same basic materials were used:

image001.jpg


Etalbond, 3D printed custom box, some carbon vinyl and 2mm acrylic panel. Fuse was added for short circuit protection, voltmeter is used to monitor volt drop under load:

image003.jpg

image002.jpgimage004.jpg

And here is how everything mounted looks like:

image005.jpgimage006.jpgimage007.jpg

I have preordered the McLaren GT3 V2 Fanatec wheel, which actually came long before schedule:

image009.jpg


All day I was printing additional QR Fanatec wall mounts, all wheels were relocated as follows:

image008.jpg


And here is the final picture - the current state of the rig at this moment:

image010.jpg


With this the initial build log is complete. I have some upgrades planned as mentioned, but they will come in at earliest end of next month.
 
Upvote 0
Part 19 - Showcase

Having completed the project at this stage there is not much more to be added, but still have some pictures left, showing the whole setup in more detail.

After assembling everything, finally there were no more parts, cables and random stuff lying around on all horizontal surfaces. Here is how it looks now:

IMG_4839.JPG


My collection of model cars (not so big, but I have about 50 more unassembled kits waiting for better times to be done):

image001.jpg


This is roughly where the keyboard stays in working mode, second picture is when retracted. Have to say the monitor arm works like a charm - stable enough at least for working, still have not tried it in gaming:

image002.jpgimage003.jpg

Close up of current pedal plate + vibration isolators mounted:

image004.jpg


My gaming PC mounted on the side of the rig:

image005.jpg


Windsim, cable management, RGB lights all around, SimHub dashes:

image006.jpgimage007.jpgimage009.jpg

Play mode with the WRC wheel:

image008.jpg


This concludes my initial report, hope you enjoyed it.
Stay tuned for more next month when I figure out how exactly to proceed with the project.
 
Upvote 0
Thanks for sharing your rig build with us. It is really nice and I hope you really enjoy it. I still fly and drive a desk:O_o::unsure: and I see my gaming chair at your table. The dream is to one day have something like you have, but I'll probably build a cockpit out of wood since I'm into things like that. Just need to get my health better so I can undertake the task.

The way I understand your story is you really started the upgrade process in March of 2021, is that correct? You have really worked your butt off to get that much accomplished in that short of time:thumbsup: I've really enjoyed reading and looking at what you've done.

As someone that's been married for 33 years, here's a word to the wise: "This is why we wind up having homes larger than we need and/or basements/garages/work buildings";):D The women understand us...............to a certain extent, but then you hear a fuse pop in their head, facial expression you've never seen before and then you hear "This looks like a child's room" to which my response was.........."Exactly". She just had to crack a smile and laugh. Now I have mine in the bonus room of our house. I play golf so she's used to being a "widow" and is very understanding.

Cheers

Thanks, hope you manage to build yours soon!

And yes, it really started in mid March and was done in about 3 months in total.

I was thinking initially to build something from wood and reuse my desk, but turned out locally profiles are quite cheap - 1m 4040 is 10 EUR, 4080 is 15EUR per meter. This got me thinking I can build only half a rig using the Chinese gaming chair (like the one you have) and 4080s, put it on wheels and be done. I went for the full rig because after calculating the cost for complete rig and the minimum for the "half rig" the difference was not that big. Also full featured rig is quite easy to expand and adjust, this won me over than trying to do something with different materials - it was just too easy and fast to achieve.

As for the space - as they say, it will never be enough. I really had big issues and spend long time measuring, testing ad designing, as I have small apartment and we have to live and work from home with my girlfriend together, so it had to take as little space as possible. At the end the footprint turned out to be the same as my working desk, so the it looks like the project was worth it.

Cheers!
 
Upvote 0
Thanks, hope you manage to build yours soon!

And yes, it really started in mid March and was done in about 3 months in total.

I was thinking initially to build something from wood and reuse my desk, but turned out locally profiles are quite cheap - 1m 4040 is 10 EUR, 4080 is 15EUR per meter. This got me thinking I can build only half a rig using the Chinese gaming chair (like the one you have) and 4080s, put it on wheels and be done. I went for the full rig because after calculating the cost for complete rig and the minimum for the "half rig" the difference was not that big. Also full featured rig is quite easy to expand and adjust, this won me over than trying to do something with different materials - it was just too easy and fast to achieve.

As for the space - as they say, it will never be enough. I really had big issues and spend long time measuring, testing ad designing, as I have small apartment and we have to live and work from home with my girlfriend together, so it had to take as little space as possible. At the end the footprint turned out to be the same as my working desk, so the it looks like the project was worth it.

Cheers!
Thanks for the response and the pricing info and your thoughts. It gives me something to think about.

Cheers
 
Upvote 0
It has been a busy month! Completed a lot of upgrades, new PC and monitor, made some more boxes, added some of the Dayton exciters.
For a change decided to make a video of the current status of the rig, so here it is:


Also made a small instruction video for the Fanatec WRC wheel magnetic shifter mod - if somebody needs it:


And of course will be continue the build log later on sharing all the new details.
 
Last edited:
Upvote 0
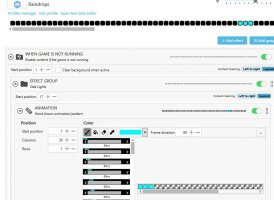
As I received a lot of questions about how I set up the aRGB lights, decided the best place to put detailed information is here.


So, basically my setup consists of 4 separate aRGB strips, connected in series - right strip - back bottom - back top - left strip. Right and left are 36 LEDs each, back ones are 31 each. All effects are just offseted to start in the correct LED count.

RPM display is using the standard SimHub effect. Side strips start from the end and display it full length, back ones start in the middle of the strip and have only 16 led count to fill up towards the ends (one LED overlaps as I have 31).

RPMs.jpg


The "Raindrops" and "Big Bars" effects when not in game are drawn by me, following the same idea - they start offseted at the end of each strip and loops:

Back.jpgSide.jpg

Complete profiles are attached below for convenience and further reference, hope they are helpful:

 
Upvote 0

Part 20 - Monitor Upgrade​


It was busy half a year, lot of things changed since the last build log update. Finally I managed to go through my photos, clean and arrange them. So, let me continue the story.

Why I was away, a lot of boxes arrived home:

IMG_5856.JPG


The biggest one being a new monitor - Samsung G9 - I proceeded with dismantling the triple setup. For the time being reused the 3D printed monitor mount I already had. Have to say, it held up pretty well:

IMG_5861.JPGIMG_5864.JPG

It was fairly simple job so I had it running in no time. It was a little hard to do it without help, but it is possible:

IMG_5863.JPG

IMG_5875.JPGIMG_5879.JPG

Short afterwards a new package arrived:
IMG_5953.JPG


It contained Sim-X-Pro PC tray and monitor Mount. Things started looking much better:

IMG_5956.JPGIMG_5959.JPG

As I am working also every day in the rig, have to say the G9 is also amazing for productivity - as long as you use some display splitting software:

IMG_5987.JPG
 
Last edited:
Upvote 0

Part 21 - Gaming PC Upgrade​


The other boxes contained all part for new gaming PC, as my was almost 10 years old. The Fallout Case mod also had to be retired - it was too heavy and did not particularly like it attached to the rig:

IMG_5966.JPG


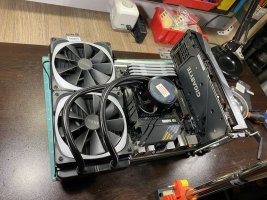
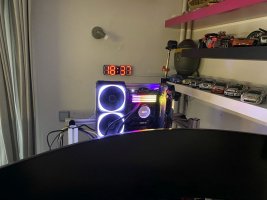
My idea was to build open frame PC mod using 3030 Alu Profiles and attach it behind the monitor. First a simple frame was built to attach the montherboard:

IMG_5971.JPG


Next to it a NZXT AIO cooling solution was attached. For the video card I had to design some custom 3D printed solution to hold it in place. Everything booted without any issues on the first try:

IMG_5975.JPGIMG_5976.JPG

I had to drill some holes in the PSU so it can be mounted on the back of the frame. I wanted a clean look, so decided to hide away it. Mostly this is the complete PC - I am using two M2 SSD drives nicely mounted on the motherboard and no other external components. Shortly after this I added one regular SATA SSD, but it is hidden between the PSU and motherboard, so actually cannot be seen:

IMG_5988.JPGIMG_5989.JPG

The whole thing weighted only 7.5kg with the side supports, so I just mounted it behind the monitor:

IMG_5993.JPGIMG_6016.JPG

Also printed some more mounts for my wheels and placed them under the shelves:

IMG_6104.JPG


And here is everything working together:

IMG_6283.JPG
 
Last edited:
Upvote 0

Part 22 - 3D Printed Parts 1 - Random Stuff​


I designed some side mounts for the Fanatec shifter. They cannot be seen on the picture, but one of the boxes contained a Fanatec handbrake - so here they are:

IMG_6132.JPG


Also I had some bike grips around so I changed the original handle, as really did not like it much. As an added bonus the bike grip is longer, so it was more comfortable for me to have the handbrake higher:

IMG_6137.JPG


I made also a simple bracket to hold the Razer Nommo speakers in place:

IMG_6187.JPG


Some simple holders for the extra shifter knobs:

IMG_6234.JPG


And also modified the existing design for bottle holder to have thicker base and stronger side support:

IMG_6403.jpg


Added two more Amps in preparation for adding additional bass shakers. I ended up finally with a single holder for 5 amps:

IMG_6448.JPG


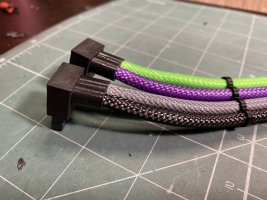
Also designed numerous cable guides to help me in custom sleeving all PC cables:
IMG_6624.JPGIMG_6695.JPG

And in the meantime printed some Thingiverse designs just for fun. Some handy drawers and the Stig:

IMG_8433.JPGIMG_8357.JPG

I am working now on documenting my designs and putting them on Thingiverse. Will link them here later.
 
Last edited:
Upvote 0

Part 23 - 3D Printed Parts 2 - Wind Sim Shroud​


Really did not like how the Wind Sim looked, so I ordered several types of car air vents in hope they will work with my shrouds. I ordered three types - Mini Cooper, Ford Focus (2005-2010 I think) and Alfa Romeo 147.

First I started with cutting the wind tunnel in my shrouds, as the Mini Cooper vents war pretty bulky. I simply hot glued them and it worked perfectly:IMG_7215.JPGIMG_7209.JPG

Next mounted on the sides of the base. Here you can see my Razer Hammerhead headphones, which I use for work, mounted on custom 3D printed dock, which uses the original cable to charge and hold them in place:

IMG_7212.JPGIMG_7218.JPG

Pretty good fit with the wheel on:

IMG_7220.JPG


Some point down the road the 3D printer was upgraded to bigger one, so i continued to build upon the Wind Sim parts. First printed a back grill and some better mounting solution:

IMG_7494.JPG


Then I designed new shroud, which will fit the Alfa Romeo 147 vents:

IMG_8344.JPGIMG_7618.JPG

I also added later ad wind tunnel, which clips in the shroud. This was much needed, as I lost quite a lot of wind strength with both vents and the back pressure they produced. Now I use the Wind Sim at 90% - it is very powerful:

IMG_8340.JPG


And here is it mounted on the rig:

IMG_8888.JPG


Some of you could have noticed a lot of new things on the rig. Reason for this is that I am not going chronologically, but rather grouping the mods by types. Sometime later I will get to all of the rest.

As before, everything designed by me will go shortly on Thingiverse and will be linked here.
 
Last edited:
Upvote 0

Part 24 - Gaming PC Custom Sleeved Cables​


This part dealing with cables took pretty long time - very tedious work, as you can imagine. First off with the boring stuff. I bought new power splitter to mount on the rig with two 15cm profiles. Also did some cable management:

IMG_6067.JPGIMG_6090.JPG

The PC placement proved quite comfortable for working on it without removing it completely. Here is modification done in place to the PSU cables:

IMG_6569.JPG


Then followed quite a lot of 3D printed custom cable guides and connector caps, lot of custom cables making and reconfiguration. I tried to make it look nice on the back as well. There is not much further to explain here, so I will just leave the pictures to speak for themselves:

IMG_6720.JPG


IMG_6784.JPGIMG_6785.JPG

IMG_6723.JPGIMG_6780.JPG
IMG_6781.JPG


And here is how it looks at the end from afar:

IMG_6788.JPG
 
Last edited:
Upvote 0

Part 25 - PC Power Button Box​


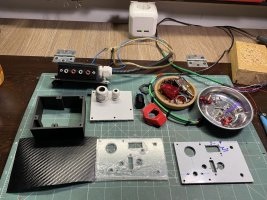
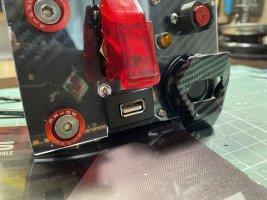
Next project was to make small button box, which will remotely control the PC. Also I added to it a front USB and toggle switch for the 12V power supply I am using for additional. Again i used the same method and materials for the front panel:

IMG_6247.JPGIMG_6258.JPG

Was wondering a lot with which color to go:

IMG_6260.JPGIMG_6261.JPG

Soldering it all together is pretty simple task, you need 8 cables to the computer - 4 for the power and reset button and 4 for the indication LEDs (the start button led is connected directly to the Power LED connector on the motherboard). Of course it was properly sleeved:

IMG_6262.JPGIMG_6266.JPG

Here is the complete design:

IMG_6267.JPGIMG_6280.JPGIMG_6299.JPGIMG_6300.JPG
 
Last edited:
Upvote 0
Part 26 - Bass Shakers, Part 3 - More Bass!
I ended up buying a lot more shakers, also had big issues with the DAEX32EPs - all of it is discussed in This Topic
There is no need to describe it again here, so will just add all the rest modifications I did:

As proof of concept I added one DAEX32EP to the pedal plate for engine sound and jump landings. Worked great, but did not lasted much as it again broke very fast:

IMG_6321.JPGIMG_6352.JPG

I also added one on the shifter arm for Gear Change, Gear grinding and engine sound. It was great, again broke fast and too much extra noise:

IMG_6350.JPG


All 4 DAEX32EPs on the seat were properly sleeved:

IMG_7003.JPG


Started experimenting with Dayton Pucks - pretty easy to mount on the Fanatec Shifter side. Later on I remodeled some Thingiverse holders for them, which work much better:


IMG_7239.JPG


As all Bass Shakers were powered from my speakers' PSU, I ordered new one. Spend lot of time designing and building power splitter for the five AMPs and custom Kill Switch. After about a month spent working on it I mounted it. Imagine my disappointment when it did not work properly. This is cheap LED PSU, so it does not have the proper filters - all the amps introduced nasty noise through the bass shakers, also were disconnection all the time from the USB. Is pent a night trying to figure out what was wrong... At the end I ordered proper Amp PSU from Aliexpress, but more on that later on. For now here is all the work done, to no avail:

IMG_7284.JPGIMG_7286.JPG

On the last picture you will notice a Dayton Puck mounted on the side of the shifter arm, next to my Heusinkveld Sequential Shifter - really have no idea when exactly this happened, but at the end all my testes showed the Pucks to be the best option for Shifter effects on this part of the rig. Now I really notice if they don't work - the shifting feeling is much deeper with them both with the HE and Fanatec shifter (I use both, Fanatec is for H pattern only).

I tested mounting there a PuckKicker, modified and printed from Thingiverse - have to say even with both Pucks mounted, it was disappointing. It is much better with them mounted on the both sides on shifter arm and Fanatec shifter body:

IMG_7306.JPG


In the process I also ordered Dayton BST-1 and BST-2 for testing, mounted the BST-1 between the two Aura's under the pedal plate. Both of the Aura's were place on the outside as well. Here is the final solution I used for mounting three bass shakers and the Fanatec V3 Inverted pedals:

IMG_7423.JPGIMG_9185.JPG
 
Last edited:
Upvote 0

Part 27 - Random Upgrades​


Some of the upgrades here were already seen in other photos, but will go over them here as well.

First of all I really did not like the flex of my WRC and McLaren wheels, so I ordered metal QRs for both. Have to say even with the CSW 2.5 base it was worth it - much less flex immediately and much more direct feeling. I was able to feel small effects, which were not apparent before:

IMG_6792.JPGIMG_6793.JPG

Changed the pedal faces - the OMP ones are popular choice, direct fit and extremely comfortable:

IMG_8862.JPG


New gear shift handle arrived - pretty comfortable for sequential:

IMG_6764.JPG


Beer Holder has new place. HE SQ shifter uses the small knob mainly because of space issues - handbrake is too near. Also with the shorter knob the mechanism's feel is much more direct. With the Big handle, pictured above, it is a little less pronounced:

IMG_7363.JPG


After purchasing dedicated sequential shifter from Heusinkveld, I had to modify the Fanatec handbrake so it fits. I drilled third hole in the base, allowing it to mount somewhat in the middle positon. Having this I managed to arrange pretty well the two shifters with handbrake in the middle:

IMG_7091.JPGIMG_7241.JPG

Also purchased a used Oculus Quest 2, pretty good VR for its price. It was modeed with Aliexpress sticker. Also printed some wall holders to keep it near the rig:

IMG_7256.JPGIMG_7264.JPG

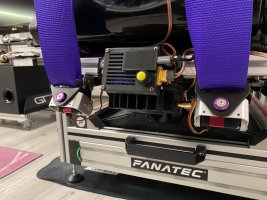
Added a seatbelt, as based on the plans I had at the time it would be needed:

IMG_7265.JPG
 
Last edited:
Upvote 0

Part 28 - Next Level Racing Motion Platform V3​


Maybe you noticed in previous post that the seat is different, and here is the reason. I was on the lookout for quite some time to add some motion to the rig. Having very limited space (this was the reason I also went the G9 way), seat mover looked the obvious choice. Black Friday 2021 surprised me with very good Amazon deal on the NLR V3 platform, so I went for it. Based on all the reviews I watched, it seemed pretty good:

IMG_7367.JPG


Me having a custom rig, which has all sizes different from the popular pre-build ones, I had to come up with mounting solution. The side platforms are pretty wide and tall, so they were unusable. I really needed to put the platform inside the cockpit, as the seat is the correct height for comfortable working, so the total height was needed to be preserved as much as possible. At the end I came up with the following solution - put two 4040 rails on the side and mount the platform underneath with angle brackets:

IMG_7369.JPGIMG_7370.JPG

My rig has 52 cm between side rails, platform is 46cm wide - I can work with only 6cm space, which is not enough for nothing. At the end I managed by putting two extra rails on top of the side base ones, then dropping the platform between them and suspending it inside the rig. This gave me very low profile as needed. My first solution to mount the Bride seat was two rails, mounted on the platform as below:

IMG_7380.JPG


It is well known that NLR use custom seat width, which is 2cm wider than standard 46cm aftermarket seat. I managed to reduce these 2cm by using the rubber dampers, which were supporting the seat. This had the added bonus of isolating mechanically the seat from the base:

IMG_7386.JPGIMG_7388.JPG
IMG_7389.JPG


On the whole pretty neat solution. As you maybe saw in previous post, I have moved the Aura bass shakers as proof of concept some time ago to the sides of the seat itself. Both 15cm profiles are screwed directly with side bracket to the same bolts, that hold the bottom seat. They needed some persuasion, as it is about half a centimeter difference, but easily manageable. . This worked perfectly - now I have very distinctive division between left and right shaker, simulating perfectly suspension, also after month of use nothing came loose:

IMG_7402.JPG


I had a bottom mounted BST-1 shaker, which I mounted on one side to a 3030 profile, on the other directly to the seat. This was very ingenious solution to a complicated problem - I just used some 20mm washers, screwed at angle the sides of the rail and fixed them with zip ties to the support bar at the end of the seat. Having moving platform it was crucial to mount the belts to it, not the rig itself. The side belts are mounted to a hole in the seat support, right behind the shaker supports. The front belt is just tucked under the seat between its bottom part and the support bracket. Pretty happy how easy it all came together. Have to say this solutions still holds till today without any issues:

IMG_7468.JPG


And one shot of the final setup (a lot of cable management followed the next month):

IMG_7415.JPG


As for the NLR V3 Motion Platform, I am using heavily the past 4 months and have to say it is great. I lowered it to about 70-80% in all games and it is very enjoyable. Anything past this is just too much.

Paired with all 13 shakers I have currently, which are as follows (yes, I bought more!):

4x Auras in CM for wheel effects
1x Aura on Pedals for engine and Jump Landing, also has gear change
2x Dayton Pucks, mounted one on the shifter rail one on the Fanatec shifter itself for gear effects and engine sound
2x Dayton BST-1 mounted on seat - one on back rest one below, both with with direct contact for engine and jump effects, gear change
4x DAEX30HESF - as suggested in the other discussion I changed them fro the DAEX32EP-4s I had (almost all of them died) - for speed effects, directional

I have to say all these vibrating paired with the V3 are incredible. My favorite is the Jump landing, it really butt kicks you. I am still figuring out some isolation issues with the pedal plate, but the rest is very good. And in VR of course it is even better!
 
Last edited:
Upvote 0

Part 29 - Dedicated Monitor Stand​


Some spare profiles were left, so made this fancy stand. Also the new 3D printer - love this cheap chinese thing, it upgrades itself, has glass bed and makes amazing prints. Already made for 4 month more than 1000 work hours on it. also upgraded half of it for very cheap:

IMG_7401.JPGIMG_8424.JPG

Having put now motion in the rig together with all these vibration I started to dislike the monitor shake. Ordered some more profiles, decided to go for standing mount. Fires removed the whole structure:

IMG_7452.JPG


Did not take much pictures, as it is not that special - lot of profiles, lot or cable management, lot of new mounts for power bricks - in general too much work and no time to make a lot of photos:

IMG_7992.JPGIMG_8854.JPG
IMG_7465.JPG


And here it is more or less finished from afar:
IMG_7992.JPG

IMG_7904.JPG
 
Last edited:
Upvote 0

Part 30 - Robot Servo Belt Tensioner​


After the moving platform and belt installation, next natural step was to build a belt tensioner. I wanted to go the cheapest way possible, so decided to build it by using Robot servos and SimHub as per blekenbleu's design.

Have to say robot servos are not the best choice around for belt tensioner as it is noisy, but it works pretty well and is the easies one to build. I play with headphones and still hear the servos (platform, shifters and all other things are not heard), it is not very pleasant but is in general manageable.

I modified a little his profiles to be uploadable to Arduino Pro Micro, also modified somewhat the profile to work based on general acceleration, which works for all games (tested on Dirt Rally 2, WRC 10, Forza Horizon 4 and 5) - in general worked perfectly in every game I have SimHub working. Also added another check to see if game is running, as belts were staying tensioned after I finish race and were reset in next race. Everything is on GitHub, link at the end of the post.

First of I prepared with extensive reading and ordered parts. Went for the 35kg servos, as they were cheaper and it was suggested they are enough. Here is the proof of concept using 35kg servos, directly connected to 5V power supply and Arduino:

IMG_7487.JPG


And of course like with everything I save on it was a mistake = I always end up buying the expensive stuff at the end. They were working great, don't get me wrong, just when they are fully locked they burn very fast. Both servos were dead after two days of use. At the end I ordered two 65kg ones, all metal gears and mounts - here the difference in size compared:
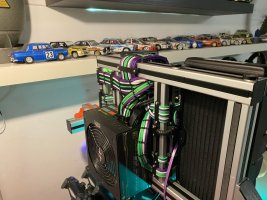
IMG_8123.JPG


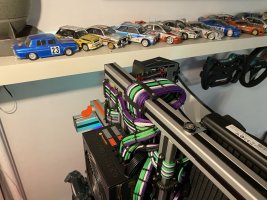
Around this time my new Amp PSU came. It is 24V 650W, filtered, have to say it does very good job at powering my 13 shakers, Wind sim with triple fans, belt tensioner and all the aRGB lights I have. It is filtered, no noise, everything works great. I also purchase two step down convertors for 5V and 12V lines. Mounted them together, all of it was designed to be mountable on 8040 profile. Added the custom 3D printed Kill Switch:
IMG_8135.JPGIMG_8229.JPG

Designed a custom belt roller as well. It uses ball bearings, mounts directly to the belt guides of the seat, it is truly universal. Roller part can be printed in any length you need, all is held by 5mm threaded rod cut at the needed length:

IMG_8170.JPG


In the meantime the rest of the parts arrived - 6x super capacitors and variable step downs. The idea was to power the servos at they limit of 8.4V, supercaps are smoothing they performance - this makes them incredibly fast with immediate response. Also a little quieter. This is the first box, which hold two rows of 3x supercaps - each for every servo. I have to say the first day it burned down - the cables inside did not manage to bear the current, that supercapsare delivering:

IMG_8236.JPG


After measuring the actual current, drawn by the servos at full lock (around 3.84A per servo at 8.2V) I calculated only one set of 3x supercapacitors will be enough. I measured its charging current (as the step down also burned) - initially it draws 4A for about a second, then it drops rapidly. This means I would be able to use a single small 5A stepdown which converts 12V to 8.4V. Then designed a custom 3D printed enclosure. Inside it holds the 3xsupercaps, Arduino, also threw in a car fuse for safety. The button is connected to the reset pin of the Arduino. All is mounted on the 3030 rail zip tied to the set - it hold still great after more than 2-3 months of heavy daily use:

IMG_8283.JPGIMG_8288.JPG

This is how the complete setup looks like:

IMG_8289.JPG


As you can see on above picture another upgrade happened around this time - Front BST-1 was mounted to the back of the seat and it was changed with another Aura on the pedal plates. I really like the Aura's deepr bass, it is able to deliver stronger lower frequencies in front, but after testing both have to say they are pretty close as performance. If they are mounted in the correct spots you can for sure go with the cheaper Dayton Option - I drive my auras at 70 and 75% back and front.

I used a thingiverse box for the stepdown, was planning on building my own, but this is how it stayed. The automotive lamp is connected in parallel to the supercaps through a switch - when I kill the PSU this circuit is used to offload faster the supercaps safely. It takes about half a minute for complete offload, have to say the caps are capable of powering my shaker setup for about 10 seconds before they discharge - pretty impressive, more than enough to drive the two servos:

IMG_8291.JPG


Here is quick demo of the belt tensioner in use:


And a quick video demoing V3 platform + belts when cliff jumping in AC:


GitHub project can be found HERE
Thingiverse designs will be linked here when I manage to upload them
 
Last edited:
Upvote 0
Back
Top