DIY Sim / Productivity Rig with Tactile - Build Log

Hi All!

I am starting this log as a story of my journey in upgrading my outdated desk to proper sim rig. In the process I stumbled across a lot of issues and questions, for which I could not find detailed information and pictures (as far as I saw it is quite common for the subject). This I decided to write up a build log with all that was done.

First of all, here is what I started with:
image001.jpg

image003.jpg


This is my old gaming desk, which was used both for sim racing and work (I work home office). The biggest issue with it was that when I switched to Fanatec setup it was not adequate support any more and I had to start thing of something more stable. Also another issue was that every evening after finishing work I had to mount the wheel and handbrake to drive, then had to remove them in the morning. This is not so big deal, but some evening I was just too laze to do it so I wouldn't play.

First I started investigating buying pre-fabricated rig, but all of them wouldn't fit my needs. As I am long years experienced computer modder, of course decided to pursue the DIY path. Lucky for me I was able to source all materials locally and they were rather cheap - I was way under the pre-made rig prices.

First of all started by listing all the requirements:

1. Completely DIY scratch build by my design
2. Will be used both for work and sim racing
3. Seat has to be high so I can rest my feet on ground (as I am 1.90m tall this required seat height about 40-50cm above ground)
4. All driving gear should be mounted permanently and not get in the way of monitors while in work mode (Fanatec coming with QR system is great advantage)
5. Ideally pedals will be mounted so I can stretch my legs and rest on them while working
6. Integrated monitor stand is preferred
7. Shifter, handbrake should be mounted in such way that mouse can be used all the time in comfortable position (work mode)
8. Seat should have sliders to be comfortable for other people, also for easier access

Having this in mind, I went ahead and downloaded MayCad (apparently the preferred tool for designing with Alu extrusion profiles). Right now I do not have the original design at hand, but either way we will get to this stage later in the build log.

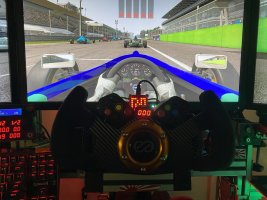
For now let's start with a Teaser picture of the current state of the rig:

image002.jpg


After building the first version, I could not stop so added the following:

1. Made new gear / info displays (I am using Simhub)
2. At some point switched to complete Fanatec setup (pedals and shifter)
3. Added a wind sim
4. Added 4 Aura bass shakers in chassis mode for tactile feedback
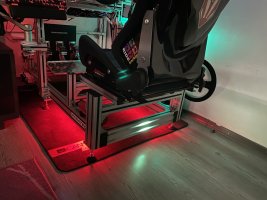
5. Added addressable RGB lighting showing REVs and light effects

Here is short video demoing the RGB lighting:


Of course I have other upgrades planned, but they will be done later on after the summer ends:

1. I have 4 more Dayton DAEX32EP-4 exciters, which will have to mount for additional effects - still have not decided where to put them exactly.
2. Will change monitor setup - actually already got whatever I need, but no time to install it - will be updated later when I get to it
3. Will have to upgrade my PC - I am still using Athlon FX 8350 with GeForce 1060 and it is getting very outdated
4. Will be retiring my modded PC case as it does not provide easy access. Already made preliminary design how all will look

In the upcoming days I will be posting replies on the topic with a lot of pictures and technical details following the extensive collection of photos I took in the process and also sharing all the technical solutions I came up.

Hope this helps others and you enjoy my story,
Cheers,
Stoyan
 
Last edited:
Part 01 - The Legacy Setup

It all began sometime in December 2019, I was occasionally playing Dirt Rally with my Logitech Formula EX wheel when the new 2.0 version had promotion on Steam. After buying it I really enjoyed the online challenge mode, so after playing half a month figured out new wheel is needed. After reading and checking out Youtube videos, I decided and first thing in January bought a used Logitech DrivingForce GT - this being the cheapest option for enjoyable Sim Racing. Pretty soon afterwards also got a second hand Thrustmaster T3PA-Pro pedals, as the original ones were quite awful. Also ordered Ebay Chinese handbrake somewhere around February - all of this proved very good decision based on the situation that came in March 2020.

I already had my already 15+ years old desk, which I even do not remember when was build by my design with me and my father. It used to accommodate 20" Sony Trinitron CRT from a SUN computer station, thus the big upper panel. Back then all desks had pull up keyboard trays because of CRTs, but I also added lower arm supports for mouse and gaming keyboard. It had lower shelf doubling as structural component and extra storing space, if I ever need it (for printer).

image008.jpg


As I was using single 27" monitor naturally started looking in obtaining a triple screen setup. Issue is there is not much space where my gaming desk sits, so another way was chosen. I managed to find some extremely cheap old 15" Asus monitors, which have the same width as the 27" height. I configured them to run in 1080x864 resolution which perfectly matches the big monitor when flipped. For the 20 EUR is pent on them the result was pretty cool - them being Asus produced similar colors to the central one.

Here is the initial triple monitor setup + storage being utilized to keep my wheel. I was using at the time old Recaro seat bought for my car, converted into office chair. It had 4 stopper caster wheels, which of course was mandatory for sims:

image001.jpg

image002.jpgimage003.jpg

One of the first upgrades after it was ditching the big Logitech Keyboard and switching to a smaller one for space saving. As at this time home office kicked in, here is how it looked in both setups - office and gaming mode:

image004.jpgimage005.jpg

The desk was upgraded with some furniture latches, fixing the keyboard tray in place keeping good platform for the wheel:

image007.jpgimage006.jpg

Using three sturdy monitor stands gave me the opportunity to create another shelf, holding the speakers. It was made from some spare flooring:

image009.jpgimage010.jpg
 
Upvote 0
Part 02 - Initial setup continued, SimHub Dash

Continuing with the setup, the handbrake was fixed with holes to the mouse platform, slightly at angle. Also some car CCFL wire strips found their place around the mouse and keyboards mats. Also on the second picture the preliminary testing for SimHub dash can be seen:

image011.jpgimage012.jpg

Of course watching setups I also wanted a SimHub dash, so when the Aliexpress parts came a very fast and dirty initial dash was assembled. Actually it proved very useful:
image013.jpg

image015.jpgimage016.jpg

And here in all its glory:

image017.jpgimage018.jpg

Mostly this was the setup for 2020. sometime when the winter started and Dirt 5.0 came out, we were gathering with friends every Friday for a drink and playing on the TV with gamepads. Eventually at some point they wanted to test the sim setup. Very fast we switched to sim racing Fridays - several people gather at my place and we turned it in somewhat underground sports bar.

Here is a picture of a friend testing Dirt Rally 2.0, while others can watch on TV:
image019.jpg


And this is how it looked in work mode at the end of this setup's life (you can see in the background how my scale model collection grew in one year) :

image020.jpg


And somewhat obscure panorama of the place:
image021.jpg
 
Upvote 0
Part 03 - New setup and seat testing

After more than a year with the DFGT, finally decided to switch to something better. At the time, the Fanatec WRC wheel was pretty new (beginning of March 2021) so I went ahead and order it as bundle with CSW 2.5 base.

In the meantime, while waiting it to arrive, had to deal with another issue - there is no more shifter in this setup. After some consideration I went for the cheapest option - went straight away to a local shop and purchased Logictech G29 Shifter.

image001.jpg


As I did not have and spare DB9 connectors lying around, decided don't care about the warranty at this price point and directly cut off the cable. Arduino was soldered, mounted in separate case as shown. Owning 3D printer also started upgrading the shifter right away - first tried a simple stiffening mod that fits under the original shifter boot:

image002.jpgimage003.jpg

After using it for some time, I switched to the All-In-One mod found on Thingiverse - much better feeling, also option to quickly shift to sequential mode:

image005.jpg

image004.jpgimage006.jpg

Also began testing different seat options - started borrowing my girlfriend's chair after work (on the pictures above you can see the two door wedges used to fix the chair in place - worked pretty well):

image007.jpg


After a long week upgrading the shifter and testing the other chair, the Fanatec stuff finally arrived (WRC wheel + CSW 2.5 bundle, together with table clamp):

image001.jpgimage002.jpg

The night before it came I put a wall clamp for the wheel to print - pretty satisfied with the result:

image003.jpg
 
Upvote 0
Part 04 - Pedals Upgrade, More Wheels, Magnetic Shifters

As the setup got updated, of course the rest of it was not forgotten - after some longer wait some more parts arrived.

The T3PA-Pro pedals received a Load Cell Mod (was too impatient and lazy to do one myself):
image001.jpg


Added some RC shocks on gas pedal (clutch one received it later on). Shocks were from AliExpress, 3d parts were found on Thingiverse:

image004.jpg

image002.jpgimage003.jpg

Pedals also received some higher feet, as they were sitting too low and were quite uncomfortable. Here also you can see where the wheel base is stored:

image005.jpg


As there was no such thing on Internet, I had to design one myself - neodym magnet paddle shifter add-on for the WRC wheel. Turned out very simple project:

image006.jpg


If you have the need of one yourself, it can be downloaded on my Thingiverse profile: Fanatec WRC Steering Wheel Magnetic Paddle Shifters

My WRC wheel came with the Funkyswitch not working, so they were kind enough to send me one right away before sending back the original one to them so i can enjoy my new wheel uninterrupted - thus the wheel count on the below picture:

image007.jpg


I also ordered the CSL wheel hub and paired with standard drif wheel obtained locally. As it proved too big (350 mm) I sold it to a real drifter shortly after testing it. We used it to see if it makes any difference in Assetto Corsa drifting - and it surely did!

image008.jpg


As proof of concept to see if I need an open wheel, another Thingiverse design was printed and cut out from Etalbond - easy to work with hand tools material (another success, worked very well):

image009.jpgimage010.jpg

It remained for long time with one handle, as again I was too lazy to put leather on the second.
 
Last edited:
Upvote 0
Part 05 - new SimHub dashes

Having upgraded all the setup, the old SimHub dash was just too ugly and really not that much readable. on the other hand, i always wanted a wheel mounted gear and RPM indicator - so this is exactly what I set out to do:

image004.jpg


This was made of course from AliExpress components, structural materials included 3D printed parts, some car bumper washers, acrylic transparent sheets and easy to cut thick hobby foam. Finishing touches are with carbon vinyl. Later on I added some car window 95% tint as it was just too bright:

image002.jpg

image001.jpgimage003.jpg


Here is the finished result and a friend testing it, posing as a model:

image005.jpg

image006.jpg


When this was done, of course I couldn't stop there - ended up making a new smaller and better looking dash. Now it had 4 rotary encoders and a dimmer for the LCD. Here you can see how the window tint looks like as well. It was finished with some 3D printed GoPro mounts so the optimal position can be adjusted in all dimensions:

image009.jpg

image008.jpgimage010.jpg

And here is me posing for a forum picture:
image011.jpg
 
Upvote 0
06 - New seat

By the end of the month (March 2021) it was apparent that my desk just cannot support all the torques the wheel is producing and something more solid is needed. I was considering buying a pre-made sim rig, or making only some partial construction to support wheel and seat while using the existing desk. At the end it turned out I can order 4040 and 8040 Alu extrusions locally quite cheap so started coming up with initial design.

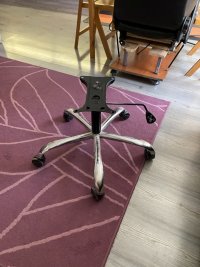
The first thing was to decide which seat to use. Being fan of Japan cars, always wanted some Bride seats for my real one. Managed to find locally cheap Chinese replicas - went with a Hybrid seat, as it was very important to be able to change the backrest angle. While walking to the courier office, I saw somebody threw an office chair base. For some time my apartment looked quite shocking with 3 chair being reconfigured. At the end i just drilled everything in the base of the chair, even managed to put arm rests:

image001.jpgimage004.jpgimage005.jpg
image003.jpg


Tested numerous configurations, but it proved that removing the feet was best for driving. The whole idea of the exercise was to measure what seat height would be needed for to sim rig, also to get the preliminary measures of what will go where exactly so I can calculate properly the dimensions of the finished products.

As I was in no particular hurry, waited for another Friday for my friends to come over so we can test the configuration (so it accommodates both short and tall people).

Here is a general idea of how the regular testing Guinea pig fits in the current config (as he is even taller than me, being over 2 meters) to try to measure the maximum distance I would need:

image006.jpg


With this post my initial foreword and preparations for the rig design is now complete.
Next posts will follow with slower pace and more pictures, as the limit being 10 per post I want to apologize for the upcoming spam.
 

Attachments

  • image002.jpg
    image002.jpg
    315.3 KB · Views: 117
Upvote 0
I love threads like these. Thanks for sharing it all!

Thanks for the interest! Here come next dose with:

Part 07 - Initial Rig Build

Regrettably, I do not have the original design plans on this computer, so will be posting them later.

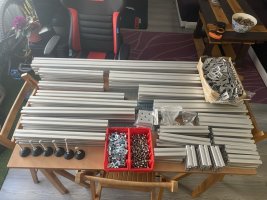
After all the measurements prepared and compared with pre-made rigs from all well know manufacturers, I came up with the final design in MayCad. Then made a list of all the needed parts and ordered them, total count was 842 parts for the initial design.

After two days a courier arrived with 46 KG of hardwired. He was quite unhappy actually in the morning, as all of it was loaded on the bottom of the van :)

image001.jpgimage002.jpg

Initial assembly began right away:

image003.jpgimage004.jpg

Then rails, seat and pedals were mounted. The wheel support can be seen in the first picture, basically the Fanatec base uses 3 holes - 2 in the back with L brackets, one in the front was mounted with longer bolt through a hole drilled in the middle of the front Alu extrusion :

image005.jpgimage006.jpg
image007.jpg


Moving on to the first big obstacle - how to mount the keyboard so I can quickly switch to work mode. Further inconvenience was the tight space between TV and wall. The first idea was pull up keyboard tray beneath the wheel base. As I expected, this proved total disaster - my knees were hitting the bottom, tray was not extending enough, it was getting in the wheel, was not stable at all and last but not least there were only mounting points for it on the 8040 sides. Here are some pictures from the dry run made to check if it is feasible at all:

image008.jpgimage009.jpg

Based on this quite expected disappointment I decided to call it a day and hit the internet searching for fresh ideas.
 
Upvote 0
How about this idea for tray that rotates:
Note it also slides a bit to it can get support from the other side of the rig.

Thanks, actually this was one of the first ideas I stumbled upon and was really considering doing it, only had two issues - cannot find locally the swinging mechanism, so I had to print one, also swinging out the keyboard it gets in front of the TV, which was something to avoid.

This leads me to:

Part 08 - Keyboard tray and initial assembly

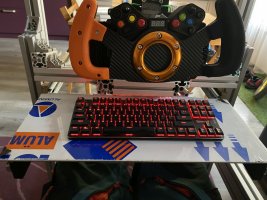
At some point in a forum I do not remember any more the solution was found - somebody propose using a VESA monitor arm. Having one very good one laying around, just mounted it on a 15sm Alu profile and it worked! The tray is from another piece of Etalbond, the arm rest is from scrap piece of wood + some foam and leather:
image001.jpg


After testing it for some time figured out this would be the way to go, so I proceeded with mounting a shelf for my company laptop. Again it is a piece of Etalbond and some carbon vynyl:

image002.jpg


As the rig was taking shape and getting quite heavy, the rest of the assembly had to be done in place. Moving the rig on top of the gaming rug allows me easily to pull it back and forward. shortly afterwards the first monitor was in place. Handbrake and shifter were mounted quickly for test fitting. In order to save some material and time, the side monitors original table mounts were reused - just clamp them to a 15cm profile:

image003.jpg


Then the two 15" monitors were mounted. Speakers were simply screwed to another short extrusion piece, VGA KVM switches were mounted in the back. On the second picture you can see the 3D printed Vesa mount (another part made even before the extrusions come):

image004.jpgimage005.jpg

Sometime along the way a new place for the computer was found - the water cooling, which was not used was ditched to save some space, computer was mounted on two 25cm extrusions and was later on screwed on the bottom side beam. The rig was starting to get in shape:

image006.jpg


Building the rig was quite simple in place, as there is quite comfortable access path behind the TV:


image010.jpgimage008.jpg

And as wrap up some pictures testing the positioning of the Drift wheel, as well as the handmade GT one. The new Sim dashes can be seen in their full glory:

image009.jpgimage011.jpg
 
Upvote 0
Part 09 - Keyboard Tray Finished, Small Commodities

With handbrake and shifter mounted it was time to put a mouse pad. Again, a piece of Etalbond came in handy. Mouse mat is glued to the platform, cut out to accommodate shifter. The Alu extrusion piece in the bottom is and armrest. It was padded with some left over mouse pad on top - quite comfortable. Another tray was added to hold wireless phone charger and cup of coffee (drinks coaster was made quite long time ago from Kyro I 3D video card):

image001.jpgimage002.jpgimage003.jpg

Beneath the laptop tray an Ikea cable rack was put to hold all Power supplies in place:
image006.jpg

image004.jpgimage005.jpg

Further on I started printing caps to close off all profiles. At the end it took about 2.5 KG of filament and more than three weeks to finish it all:

image007.jpg


Then I designed some simple clips to hold the Keyboard in place. Below both gaming and working mode can be seen:

image008.jpg

image009.jpgimage010.jpg
 
Upvote 0
Part 10 - Commodities Continued

The RGB lighting got a nice switch mounted above the additional tray:

image011.jpg


Another wheel holder was mounted on the side, driving shoes found good place to be stored. On the other front, cable management began to come in shape:

image012.jpgimage014.jpg

This is how much space actually the whole rig takes - little more than before, but being quite compact it looks actually the other way around:

image013.jpg


This is the current status up to that moment while racing:

image015.jpg


As some more extrusion were being unused, another extra shelf was created - it holds now my disco ball and party light:

image016.jpg


And here is the general keyboard position in working mode:

image017.jpg


But something quite important was missing - this was fixed fast by printing a beer holder:

image018.jpgimage019.jpgimage020.jpg
 
Upvote 0
Part 11 - New Wheels, RGB

Finally the GT wheel was completed. If had a little flex, which lost some of the subtle vibrations, but still quite enjoyable:

image001.jpgimage002.jpg

Found another handy part on Thingiverse - CSW 2.5 dust cap to close it of while not in use:

image003.jpg


Found in local store a good extinguisher looking bottle. Another custom 3D mounts were made to mount it beside the seat:

image004.jpg


After selling the drift wheel, I ordered new smaller one in Aliexpress. It came for about 4 days and is totally worth it - has 70mm dishing and 320mm diameter:

image005.jpg


Then proceeded with installing some addressable RGB lights on the back and below the sides of the rig. The Alu profile caps were printed in transparent fillament:

image010.jpg

image007.jpgimage008.jpg

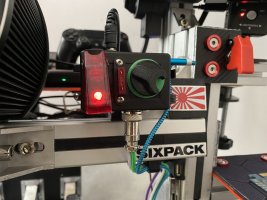
Another fancy box was constructed to hold the Adrduino and the needed controllers - power switch and rotary encoder for changing lighting profiles in SimHub. The car fuse is mostly for the looks, but also is fully operational:

image006.jpgimage009.jpg
 
Upvote 0
Part 12 - Caps and Stickers

During all the time the 3D printer was not stopping printing caps. As previously said it took more than 3 weeks and about 2.5kg of filament only for the caps:
image001.jpgimage002.jpg

I also put some stickers, as the seat looks quite ugly from behind. As always, only some stickers is not enough, so a lot of them found their place on the rig:

image003.jpgimage004.jpg

Another picture in driving mode just for show:

image005.jpg


And one more of the armrest, computer, mouse pad, drinks holder and all:

image006.jpg


I designed two types of caps to hide the 90 degree and angle brackets:

image007.jpgimage008.jpg

Also the whole rig was designed to be higher from the floor so the robot vacuum cleaner can pas underneath. Also it had pretty nice path behind the TV so it can make circles. At the end all of it proved to work quite well:

image009.jpgimage010.jpg
 
Upvote 0
Part 13 - Wind Sim

At this point I was wondering what can be added to the rig. Was not exactly convinced I need a wind sim, but why not try it - had some Arduino Nanos at hand, needed only two fans. Ordered two Noctua 120mm PWM fans with very high airflow, printed some holders and connected to the Arduino - proved to be quite an easy mod to do.

First mounting place was above the monitors, as a fast test - later figured out there is enough space next to the wheel base:

image001.jpgimage002.jpg
image003.jpg


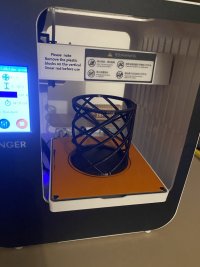
The fans were working quite OK, but figured out a shroud is needed to focus the airflow and give me better range. Went again on Thingiverse and selected one that I like. As my printer has small build volume I had to split the model in two identical parts and glue them further. After 2 full days of printing the shrouds were completed:

image004.jpgimage005.jpg

Also printed some more GoPro holders and half fan grills for additional protection on the back:

image006.jpg


And here the completed Wind Sim:

image008.jpg

image009.jpgimage007.jpg
image010.jpg


Have to admit I am quite happy with the achieved result, the GoPro mounts allow me to direct the airflow quite precise. Upgrading with shrouds allowed me to switch to higher range - now fans start at 5 and reach 100% at 160Km/h - the feeling is quite granular. Also the added experience is great, now driving with Wind off feels quite empty experience.
 
Upvote 0
Part 14 - New Pedals, Shifter, DP Switches

After spending some time with the new Fanatec wheel, I decided to switch the pedals and shifter to their ecosystem. Not that mine were particularly bad, but wanted something more real. Decided to upgrade to the hanging pedals, as already was accustomed with this setup. Proceeded with ordering the Fanatec Inverted pedal kit, additional damper for the clutch (proved to be not so needed at the end) and the brake performance kit (mandatory in my opinion).

Quick comparison of both pedal sets:

image001.jpg


Having designed properly the pedal platform allowed me to switch very fast the pedals:

image002.jpg


To mount the shifter some custom brackets were designed and printed:

image003.jpgimage004.jpg

And the shifter was mounted shortly afterwards. Mousepad had to be cut some more to accommodate the new setup:

image005.jpg


Pedals mounted accordingly:

image007.jpgimage006.jpg

Also new set of Aliexpress equipment came - 3to1 DisplayPort splitter and 2 port DP KVM switch with remote. As two of the monitors were VGA with DP converters, the third one did not support daisy chaining, this allowed me to connect the three monitors together and eliminate the long analog cabling for the KVM VGA switches I was using before. The two port KVM switch works perfectly and supports the chain, so I had to route only one cable to my personal pc on one to the work laptop. Remote also is very comfortable - the setup is much simplified now:

image008.jpgimage009.jpg

And a final picture with all new stuff:

image010.jpg
 
Last edited:
Upvote 0
Part 15 - Small Upgrades

The original beer holder was just scaled up air freshener spray and broke the moment I put it on the rig. It also needed additional support, some beer bottles were not fitting. Found a spare print night and some time - the holder was redesigned to fit all bottles, bottom was fortified, added vertical support compatible with 4040 profiles - the design will be put sometime later this summer when I have access to my original files on Thingiverse:

image001.jpgimage002.jpg

Now everything fits seamlessly without additional mounting clamps:

image003.jpgimage004.jpgimage005.jpg

Another AliExpress part arrived - tuning gear knob, perfect for sequential shifter. The whole setup started becoming quite satisfactory

image008.jpgimage006.jpg

The robot vacuum cleaner finally managed to get stuck below the computer (it is high enough, but two tight with rig supports around there):

image007.jpg


Another glory shot of the current setup:

image009.jpg


A quick teaser for upcoming addition to the setup (originally the aRGB strips were meant for it). In between printing caps and assorted parts these guys were printed - they are scaled down from the original small nanoleafs, but this is the maximum size that fits my printer:

image010.jpg
 
Upvote 0
Part 16 - Bass Shakers, Part 1 - Initial Build

Wondering what else to upgrade next, started exploring the idea of adding tactile feedback. First idea was not to spend much money, wanted to buy only 4 small exciters and some cheap Chinese Amps. Spent some time watching reviews advice and finally decided on buying 3 relatively cheap class D 2x100W amps on Aliexpress. Being so cheap as they are I decided to spend a little more money and get 4 big bass shakers, which can be use din future with bigger Amps if these don't work and will not need to be upgraded any time soon. Also added 4 small exciters for separation of additional effects.

At the end here is what was ordered:

1. AuraSound AST-2B-4 Pro Bass Shaker X 4
2. Dayton Audio DAEX32EP-4 Thruster exciter X 4
3. C100H 24V4A 2x100 Amps X 3
4. PSU - I already had this powering my main Corsair sp2500 2.1 sound system (it has know problem with burning PSUs, so it had to be changed). Being myself some years ago I decided to oversize the PSU in case power is needed elsewhere, so it was 24V at 15A.

The reason I selected these particular Amps is that the have built-in sound device, which allowed me to control them from SimHub over USB. They are not the cheapest you can buy, but still very good price and have 2 x TPA3116D2 amplifier chips each - this proved powerful enough for the Auras. For the time being i am using them in the 50-60% volume range and the feedback is very strong.

The idea is the following:
1. The 4 Auras will be in chassis mode, powered by two Amps to simulate wheels
2. Two exciters will go on the sides of the seat in series on one channel for mono effects
3. The other spare channel will power the next two exciters in series - I am thinking of putting one on the shifter somewhere, the other under the pedals.

As the Dayton exciters were long time out of stock, I stated only with the four Auras and Amps at hand.

Designed another 3D printed holder to keep the three small AMPs somewhere mounted on the rig:

image001.jpgimage002.jpg

Ordered some more 10 and 15sm long Alu extrusions to mount the shakers:

image003.jpg


After testing the Auras decided to be brave and not care about warranty - extended their very small mounting holes to 6mm so they can be screwed directly to the extrusons:

image004.jpg


Being the fastest way possible I decided to mount the front ones directly to the pedal base. I expected the channels will mix together a lot, but just went for it - wanted to test the difference myself and have some base ground on which to build on:

image005.jpgimage006.jpg

After giving some thought, the easiest way for the seat ones was mounting them with two Alu profiles on the seat rail carriers. Two of the holes are directly mounted on the carrier, the other ones are on the expansion profiles - pretty easy setup:

image007.jpgimage008.jpg

Actually, the above solution was just the fastest one - my original plan was to put the Auras diagonally below the seat so the center of the shaker sits directly under the rail. But on the other hand I wanted to keep the current position of the water bottle and make my life easier. At the end, this proved to be satisfactory enough so I left them there:

image009.jpg


And a picture with all the four bass shakers in place:

image010.jpg
 
Upvote 0
Part 17 - Bass Shakers, Part 2 - Refinement

After testing for a couple days the front channel mixing was quite apparent. Also the vertical positioning of the shakers was not that great at reproducing suspension effects. another issue was the resonance between the two shakers - front effects were amplifying each other and I had to keep the volume quite low. On the other hand ,back effects felt much better.

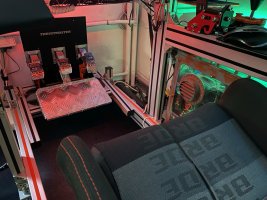
Solution for this was quite easy - I had two additional 40cm profiles, which were supposed to go under the pedals. I never used them, as it seemed unnecessary. The Auras were mounted the same way as in the back:

image001.jpgimage003.jpg
image002.jpg


Finally mounted on the rig with 4 angle brackets - relatively simple upgrade:

image004.jpg


Separated this way the front channels was much better now, but still too much power was transferred throughout the rig. This got me thinking to find some isolators to detach the pedal plate and seat from the rig.

I found locally these rubber industrial dampers, 50x20mm, M8 mounting. Of course the bolt was too long, so i had to cut them short:

image005.jpg


Then proceeded with mounting. The pedal plate was very easy - it is held only by 4 screws. While playing with the shaker setup I noticed it got very high, so I had to drop it lower in the rig. Having designed with this option on mind, this was easily achievable. Regrettably, do not have clear pictures of this setup.

Seat was removed, started putting dampers in:

image006.jpgimage007.jpgimage008.jpg

Seat was dropped lower so the same height can be kept with the dampers in:

image009.jpg


And here is the complete setup:

image010.jpg


The result is quite satisfactory - now very little vibrations travel further than the mounting place. I still have one problem though - the balance on the back is quite off in favor of the left channel. I presume this is because of all the equipment mounted on the right - computer, handbrake, shifter... Faint vibrations can be felt in the right armrest, I presume all this mass is absorbing some of the shaker power.

Otherwise having setup the volumes properly it feels quite balanced - I am pretty happy with the overall feeling.

All shakers had to be set up at different volume in order to feel the same effect strength. As far as I remember these are the current levels:

1. Front L + R - 60%
2. Back L - 80%; Back R - 100%
3. Overall SimHub Profile volume - 55 to 65% - depending on game
 
Upvote 0

Latest News

Shifting method

  • I use whatever the car has in real life*

  • I always use paddleshift

  • I always use sequential

  • I always use H-shifter

  • Something else, please explain


Results are only viewable after voting.
Back
Top