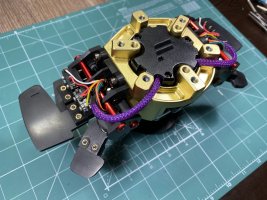
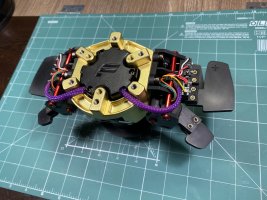
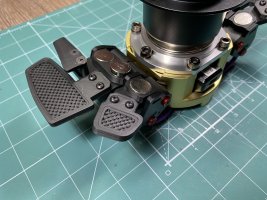
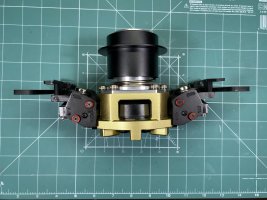
DIY Fanatec Podium Hub Steering wheel (and extra info for connecting buttons to the Podium Hub)

Hi,

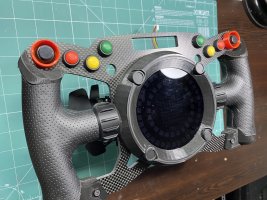
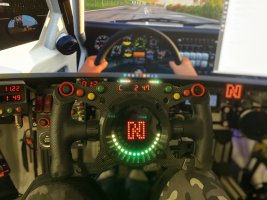
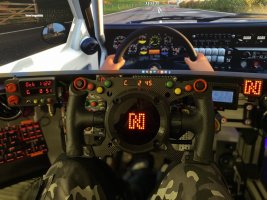
ATM I’m returning slowly to Sim Racing again and I’m mostly racing with ACC. So I decided it was time to have one more steering wheel. A GT3 style, since I only have the Fanatec BMW GT2. And I decided to make my own, since I love to design parts and I have a 3d Printer.

Background:
For the hub, I was going in the direction of the Sim Racing Machines Emulator Hub, but the final price was almost the same as the Fanatec Podium Hub (probably 30€ dif). So I decided to go with the official hardware.

For the Steering wheel, I was thinking about buying one from 3drap.it. But, at the last minute I saw for sale a brand new Thrustmaster Open Wheel (TOW) steering wheel rim with a really good price. (Someone bought a TOW and replaced the rim with one from https://acelith.com/. So, I was lucky to get it brand new!!!)

The Idea:
Since the Podium Hub doesn't come with buttons, just the connectors for the buttons, I had to make some investigation on how to connect my wheel buttons on the hub. Unfortunately I didn’t find all the answers on the internet, so I had to make some investigations, and now I will share all the secrets of the Hub here. (Later in the post you will find them, be patient).

But the Fanatec Hub only accepts 10 buttons and 2 potentiometers, and for me that isn’t enough, I will have in parallel an ESP32 board to have more buttons and rotary encoders.

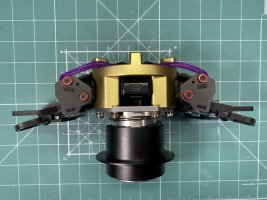
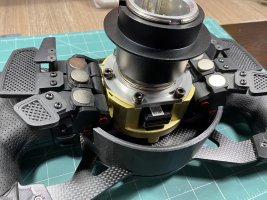
The advantage of using the TOW is the quality. Already painted and the handles are really well made (sorry 3drap and acelith, but yours aren’t that impressive). But unfortunately not everything is perfect. The hole pattern from the Podium hub is 6xØ70mm M5 or 3xØ50mm M5. And the hole pattern of the TOW is 6xØ58mm M4. So, I had to make an adapter plate, but unfortunately I didn’t find, so far, a good solution for using all the fixing holes from the hub and the TOW rim. This is a problem I will try to solve later on.

The 3D model of the wheel:

Free to use and modify at Onshape:

1664792949373.png

1664792999445.png

Electronics:
The goal is to have 4 Rotary Encoders and around 12 press buttons. Since the Podium Hub is limited with the quantity of inputs, I will connect all the Encoders and some extra buttons on the ESP32 board.
This will give me a lot of flexibility. Because when the wheel is connected, even if the board stops working, for some reason, I will have the buttons attached to the hub working (ex. Paddle Shifters).
The ESP32 board will be connected to the PC with bluetooth, and it will be powered by the USB C port on the bottom of the hub. So, I will not have any cable coming out of the wheel.

ESP32 sketches:
I’m using the software made by “real robots”
https://www.youtube.com/channel/UCLXi-fkZu0hYgSBQV7Pagrw

Sketch (arduino and esp32):
https://gitlab.com/realrobots/rr_controller
Software to configure the controller
https://gitlab.com/realrobots/rr_configurator

For more info, check his youtube channel and his tutorials. The way it works is easy and you don’t need to know how to write arduino code.

Finally the Podium Hub schematic:
3CSvCeV0I5MbAibF93-gIgO00PSRIPSPeT9amwq5WnDEx7FTSsNHRCiksFirtIr17LGmOAbZqtjikjj1gpTKU77nUCjfU2wW0-_Z1zQLzZT8ZAc5HQPUZ98L4EFkvL62ZWKnouLc


All the power output in the electronic board is 3.3V. The USB C power output is 5.0V

All the JST connectors needs to be trimmed the hooks on both sides, like in this pic:

1628779301595.png


USB C power will be taken with this USB C pcb board:

...coming soon...

finally. In my google photos shared folder I will add pic of the wheel.


Tiago Viana
 
Last edited:
And now I want to get back to the dual clutch topic. As I sold my APM module and started building Bentley GT3 replica wheel I am considering making a DIY APM using potentiometers. Has anyone tried already using 10kOhm for the sliders and do they calibrate ok or need other resistance? Also it will be little complicated to use the full range of the pots with paddles but will test short enough.

@DaStivi thanks for the idea, I am building rally module replica now and will add this shift light ;) - either way i have some spare faceplate space and wanted to fill it in with something. Maybe i can fit up to 4 LEDs below the oLED display.
Hi.
I have made a DIY APM (Advance Paddle Module).
But unfortunately is not finished... I´m too lazy...

I tried to connect Hall effector sensor and it works. I connected some pots (10k, I believe) and works. So, no problem to use them. Fanatec software makes automatic range tuning.

But I decided to use joystick pots like this:
1664786187511.png
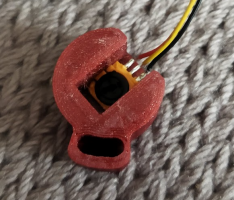
I went with this pot because the motion range from the pot is 60deg, and my clutch paddles are designed to rotate 20deg (You don´t need the full range of a normal pot (probably 270/300 deg)). And the form factor. Is much smaller.
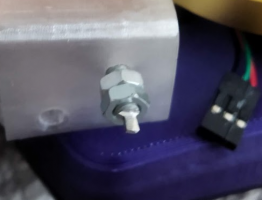
But you will have some challenges... I had to file the M4 threated rod to fit inside the small slot from the pot. It works, but it isn´t a beautiful solution...
1664786162439.png
Other note: I haven´t tried to connect 2 pot at the same time, because I have lost the 2 one... :) and, as I said before, I´m too lazy... And I have a Dual Clutch alternative that works really well for me...

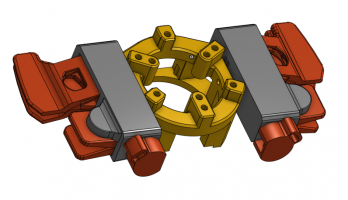
3d model:
You can find inside the 3d model of the wheel. Use the link from Onshape in the first Post.

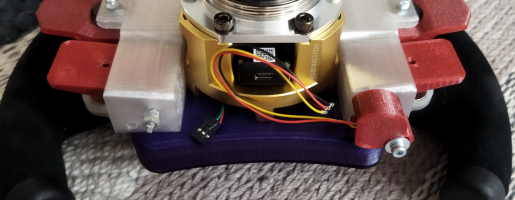
Note. This 3d model is test model. It is bulky and ugly. My plan is to make it lighter and pretty. But this will take time...
1664785930490.png

Test model:
1664786077351.png

And it uses Magnets for the Shifter paddles and for the Clutch. Round magnet 20mm diameter and 4mm thickness. For the Clutch, the magnets are position minus against minus, so the repulsive force will push the clutch lever.
 
Upvote 0
I tried to connect Hall effector sensor and it works. I connected some pots (10k, I believe) and works. So, no problem to use them. Fanatec software makes automatic range tuning.

Thanks for the inspiration! I already have design for the paddle itself with 10K pot fitted but stumbled upon another issue. I tested with the pot - using full range it calibrates and seems to work. Issue is that mu paddle has 20-25 degrees of rotation and get very little range from the pot itself. I could not find any way to calibrate this properly. Am I doing something wrong is not possible to work in this fashion?

And here is the completed paddle, today managed to assemble it:

0693322C-055A-42E0-9578-7AD1F2989F79.jpeg
C9C5B20F-E7F3-4C69-9F29-3EE39BAC840D.jpeg
 
Last edited:
Upvote 0
I remembered i have some ss49e hall sensors so switched the design to use them. Have to say the work flawlessly with my DD1.

The design is completed now, works very well. Has slight deadzone at the beginning stroke as I made it with large rotating angle, but looks better this way as the initial pull of from the upper magnet rakes a little more force than the rest of the travel.

Here it is finished:
8E00BB80-549F-4329-8518-95B9853D4A89.jpeg5C226EC1-529E-40F7-8098-A32F7AB07EF8.jpeg0A324260-74F6-4800-BE36-8DCDA88F6A6B.jpegD5053613-9B5D-4629-A7F3-E757D628AA0C.jpeg63992485-9E88-4863-8B92-79FC48EC4D41.jpeg

Already put it in Thingiverse: https://www.thingiverse.com/thing:5561576

And a short demo video:
 
Upvote 0
I remembered i have some ss49e hall sensors so switched the design to use them. Have to say the work flawlessly with my DD1.

The design is completed now, works very well. Has slight deadzone at the beginning stroke as I made it with large rotating angle, but looks better this way as the initial pull of from the upper magnet rakes a little more force than the rest of the travel.

Here it is finished:
View attachment 607747View attachment 607748View attachment 607749View attachment 607750View attachment 607751

Already put it in Thingiverse: https://www.thingiverse.com/thing:5561576

And a short demo video:
Wow! Looks very good. Congrats. I´m ashamed to show my creations, now... The effort you give to the small details is amazing!!!

Some questions.
What are this red alu spacers? RC car stuff?
Can you share the 3d model?

I´m impressed the Hall effect sensors work good with so may magnets around!!!

Since you have DD1/2 wheel base. Is it possible so change to dual clutch with bite point?
With the CSW V1 it is not possible...

Tiago
 
Upvote 0
Wow! Looks very good. Congrats. I´m ashamed to show my creations, now... The effort you give to the small details is amazing!!!
Thanks! I needed them to look nice for my new project, also did not want to spend money on the original. It was fun to make it just because I can :) Here is where they went:

7518B7EE-34AA-4876-84CF-31AB06D1CA04.jpeg48BB7C51-2382-4A40-A9D6-C64C76D763CA.jpeg
Some questions.
What are this red alu spacers? RC car stuff?
Can you share the 3d model?
These are standoffs from Aliexpress, designed for M3x18mm
Model is shared in the previous post, it is in Thingiverse with full list of parts
I´m impressed the Hall effect sensors work good with so may magnets around!!!
The Fanatec APM has also 3 magnets on clutch so I presumed it would work. I soldered one to a cable and played a little with placement until I fount the easiest place to mount.
Since you have DD1/2 wheel base. Is it possible so change to dual clutch with bite point?
With the CSW V1 it is not possible...
I have clutch bitepoint percentage setting in the Fanatec control panel - you should have it with the new driver i presume. As I am with Podium hub I do not have the needed buttons to set it up with steering wheel (I think, have to check when solder the buttons). If I put it on SRM hub it will definitely work as it has funky switch, setup button and so on.
 
Upvote 0
Thanks! I needed them to look nice for my new project, also did not want to spend money on the original. It was fun to make it just because I can :) Here is where they went:

View attachment 607997View attachment 607998

These are standoffs from Aliexpress, designed for M3x18mm
Model is shared in the previous post, it is in Thingiverse with full list of parts

The Fanatec APM has also 3 magnets on clutch so I presumed it would work. I soldered one to a cable and played a little with placement until I fount the easiest place to mount.

I have clutch bitepoint percentage setting in the Fanatec control panel - you should have it with the new driver i presume. As I am with Podium hub I do not have the needed buttons to set it up with steering wheel (I think, have to check when solder the buttons). If I put it on SRM hub it will definitely work as it has funky switch, setup button and so on.
Congrats! It looks really good. Would be cool to find a LCD that fits inside the ring.
It looks like you will have LEDs inside, right?
 
Upvote 0
Has anyone tried this for playstation support, i think it will work but not 100% sure yet, i would like to use any sort of hub that has these inner connectors and then wire my own buttons. But it has to work with PS5 so hopefully someone has tried it.
 
Upvote 0
Has anyone tried this for playstation support, i think it will work but not 100% sure yet, i would like to use any sort of hub that has these inner connectors and then wire my own buttons. But it has to work with PS5 so hopefully someone has tried it.
From the Fanatec webpage:

  • PlayStation: The functionality of this product on PS4 can be limited by the capabilities of the console (subject to firmware/OS changes and developer support). The full functionality can only be guaranteed on PC; this is also game-dependent. PlayStation 5: Check our platform compatibility page for more details.
i could not find the platform compatibility page...

It looks like is compatible with PS4/5. So, probably (cannot test), it works. But you will be limited with the number of buttons...

And you can you google to search. ;)
 
Last edited:
Upvote 0
We've been working with couple of mates on my Discord server to make DIY Fanatec emulator. I am pretty happy with the result, did all my wheels with it, including Ford Puma replica. Limitation is this does not work any more on the new CSL DD/DD+ - most probably the arduino is too slow for them.

Here is the full detail:

Here is short demo of the Puma wheel:
Cool Stuff! Thank you for Sharing.
You should create a post sharing your work. It will be easier for people to find it, then inside here.

Best regards,
Tiago
 
Upvote 0
Cool Stuff! Thank you for Sharing.
You should create a post sharing your work. It will be easier for people to find it, then inside here.

Best regards,
Tiago

Thanks, no worries, hopefully this will be helpful for somebody!

Not much free time to document it all. Shot videos, made tons of pictures, started to write a detailed guide, but too much other stuff in parallel.
I gave up on this project and moved away from Fanatec ecosystem after the unfortunate notice about CSL DD and DD+ so gathered the basic info and put it together if somebody wants to use and extend. Last thing I intend to do is make my Bentley replica wheel work with such emulator directly on wheelbase, but other than that I doubt I will extend myself any further.

Most probably I will write short guides how to build the PCB itself and will put it on my website - it is easier to manage all projects in one place ;)
 
Last edited:
Upvote 0
Back
Top