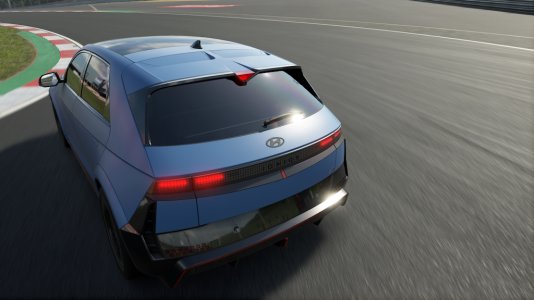
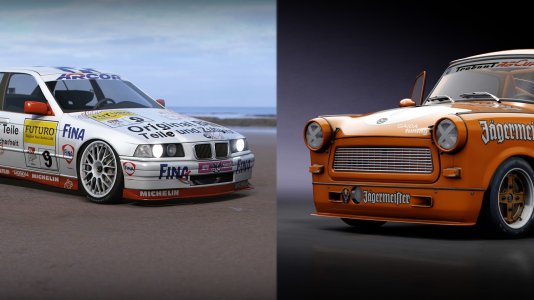
It's all about how stuff looks and how long you can look at it.

Improved Clear and Mid Clear - reduced horizon intensity.

GodRays example.


This mod is for those who like a long race, all the visuals are toned down so your eyes wont hurt when doing a 10 lap and above race.
Instructions !
1. Extract the zip to where you like.
2. Copy and Paste the Content folder to your AssettoCorsa folder.
3. Open the System folder, choose Single or Triple
4. Choose High or Normal Quality Dof
5. Copy and Paste the PP files to - system\ cfg\ ppfilters folder
I recommend 85% saturation (set it in the Effects Tab) but you can adjust it to your liking.
As you can tell from the last 3 shots - change to AC Night PP for Night weather.
Mod is optimized for 100% Exposure so if you got your expo set to anything other then 100%
because other mods required it then just remember to use Page Up or Down to set 100%.
You can set whatever expo you like but start with 100% as an entry point.
High Quality Screenshots - Know How...
Always capture shots during a replay (it's easier and quicker).
During replay, after finding the spot you want to capture press Pause do this -
1. Press F6 - to enable Chromatic Aberration
2. Press F5 - to enable High Quality car shadows
3. Press F7 - to enable Free Cam
4. Move your Mouse pointer to the right and open Photo Mode App
5. Move your Mouse to the bottom of the screen - replay panel shows up
6. Select the Replay Photo App
7. Set DoF focus to 1
8. Close Replay Photo App - by clicking it again
9. On the regular Photo Mode App - click + for DoF Factor
10. Move the Mouse Pointer to somewhere in the middle of the screen
11. Click and hold MRB (Mouse right button) and scroll up using Mouse Scroll until the car is in focus
12. Press F5 again - Use WSAD to move the camera - left, right, forward, backward and Up or Down arrows to move it up or down for fine positioning and F and G for camera roll.
Use Num + and - to set your desired FOV
13. Close the regular Photo Mode App
14. Move the Replay Slider a bit to the left
15. Press Play, wait for the car to get into position and capture your shot
If you did everything right then you screenshot should look like this.
Captured at Clear 8:00 with HQ DoF and 25 FOV.

Clear 16:30

Improved Clear and Mid Clear - reduced horizon intensity.
Clear 18:00

GodRays example.
Clear 18:00

Night 18:00

This mod is for those who like a long race, all the visuals are toned down so your eyes wont hurt when doing a 10 lap and above race.
Instructions !
1. Extract the zip to where you like.
2. Copy and Paste the Content folder to your AssettoCorsa folder.
3. Open the System folder, choose Single or Triple
4. Choose High or Normal Quality Dof
5. Copy and Paste the PP files to - system\ cfg\ ppfilters folder
I recommend 85% saturation (set it in the Effects Tab) but you can adjust it to your liking.
As you can tell from the last 3 shots - change to AC Night PP for Night weather.
Mod is optimized for 100% Exposure so if you got your expo set to anything other then 100%
because other mods required it then just remember to use Page Up or Down to set 100%.
You can set whatever expo you like but start with 100% as an entry point.
High Quality Screenshots - Know How...
Always capture shots during a replay (it's easier and quicker).
During replay, after finding the spot you want to capture press Pause do this -
1. Press F6 - to enable Chromatic Aberration
2. Press F5 - to enable High Quality car shadows
3. Press F7 - to enable Free Cam
4. Move your Mouse pointer to the right and open Photo Mode App
5. Move your Mouse to the bottom of the screen - replay panel shows up
6. Select the Replay Photo App
7. Set DoF focus to 1
8. Close Replay Photo App - by clicking it again
9. On the regular Photo Mode App - click + for DoF Factor
10. Move the Mouse Pointer to somewhere in the middle of the screen
11. Click and hold MRB (Mouse right button) and scroll up using Mouse Scroll until the car is in focus
12. Press F5 again - Use WSAD to move the camera - left, right, forward, backward and Up or Down arrows to move it up or down for fine positioning and F and G for camera roll.
Use Num + and - to set your desired FOV
13. Close the regular Photo Mode App
14. Move the Replay Slider a bit to the left
15. Press Play, wait for the car to get into position and capture your shot
If you did everything right then you screenshot should look like this.
Captured at Clear 8:00 with HQ DoF and 25 FOV.

Last edited:


