


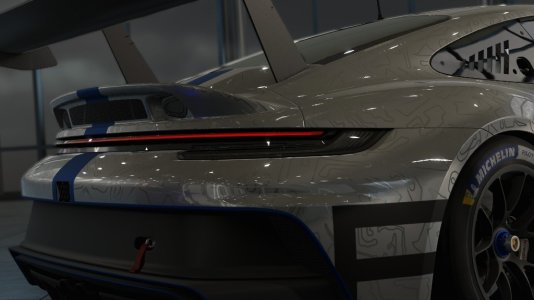
My goal was to make a minimalistic studio showroom, where it's easy to create photorealistic screenshots from almost any perspective without having distractions in the background. For creative users it also offers many customization options for the lights and colors used. Make sure to read the instructions on how to use if effectively.
I hope this is studio showroom will be useful for creators that want to present their car models and skins with realistic looking images. But you can also make great wallpaper from you favorite cars if you like
Studio & Light Setup:
The car and the showroom is completely designed to be illuminated by realtime lights. There is a large top concave reflector which is lit by plane lights which is used as main & secondary light reflectors to give the cars some nice reflections.
Two white colored spots are directly oriented towards the car to cast some soft shadows on the ground. The ground itself is reflective with low camera angles that are almost parallel to the ground.
In addition there are 4 colored spots that are used to illuminate the background canvas which also is reflected by the car. These lights can individually be switched off or changed in color etc. Just experiment and get creative with the lights
Camera:
The preset only contains an example camera perspective, since currently it is not possible to store different ones into one single preset. But often each car needs different camera perspectives anyway to highlight their best parts. So it's on you to find nice angles and details on each car and bring them out with great screenshots.
Controls:
Here are my most important keys and things I use to compose my shots.
Shortcuts:
Move camera position: Arrow keys
Adjust field of view: CTRL + Mouse Wheel
Adjust focus point: CTRL + Left mouse click on the point you want to be in focus
Enable/disable car lights: L
Open/close car doors: D
Tips:- Tilt the camera a bit to balance out your frame and give your perspective a bit of dynamic. You can do that in the camera settings tab (eye icon)
- Adjust the aperture size to increase or decrease your depth of field when you want to pick out details while the background is to distracting. My settings are usually from 1cm - 2cm. You can find the aperture setting at the visual settings tab(cog icon) -> misc -> DOF section.
- Change car steering angle to further add more dynamic to your composition. You can find that setting under the car tab (car icon)
- You need to install the Content Manager to be able to use this showroom http://assettocorsa.club/content-manager.html
- Download the zip file and just drag and drop it onto your opened content manager application window and use the green menu button on the top right corner to install it.
- Now you need to install the showroom settings preset that is inside the downloaded zip, named "Retrolux Studio Showroom v1.1.0.cmpreset". Extract this file under %USERPROFILE%\AppData\Local\AcTools Content Manager\Presets\Custom Showroom
- In the content manager select your desired car and skin in the content -> cars tab and use the CM Showroom button to start the application.
- Select the “Retrolux Studio Showroom” preset with the correct version to load up all the settings for it.
- Now get creative with it and use the screenshot tab (camera icon) to render your screenshots at the desired resolution
! NOTE: This showroom requires quite some rendering power, since it favors quality screenshots over realtime performance.





But I recommend to use my car preview preset instead: https://www.racedepartment.com/downloads/retrolux-previews.19329/